How to connect to the Foothill - De Anza VPN server
- Ryan Anthony
What is a VPN and why do I need it?
For security purposes, some of the computing services provided by the district are not available directly from the internet or from less secure district networks such as the wireless network. Examples of some services include:
- Banner INB access (Access to private information)
- Remote Desktop services that run some of the district software (Yosemite and Tahoe servers for running Clockwork, SARS, Hyperion, etc.)
- Internal only websites (for example BDMS, Argos)
- File sharing
For these purposes, a VPN (Virtual Private Network) connection is needed. This lets in only authorized user accounts and encrypts all of the traffic. Once you setup a VPN connection from your computer to the district VPN server and connect, all of your network traffic will get tunneled through to the VPN server located at the De Anza data center and your computer will behave as if it is connected directly to the De Anza network, allowing you access to internal district resources. Note that all of your traffic including internet traffic will go through the VPN server and the De Anza Internet connection while it is connected, so you should only leave the VPN connection active when you need to access an internal resource.
Information to connect
VPN server address: vpn.fhda.edu
Username: Your 8 digit CWID login that you use for MyPortal. Vendors are emailed a username, usually first name initial + last name.
Password: Same as your MyPortal password. Vendors are emailed an initial password, required to change upon first login to VPN.
Instructions for Windows 7
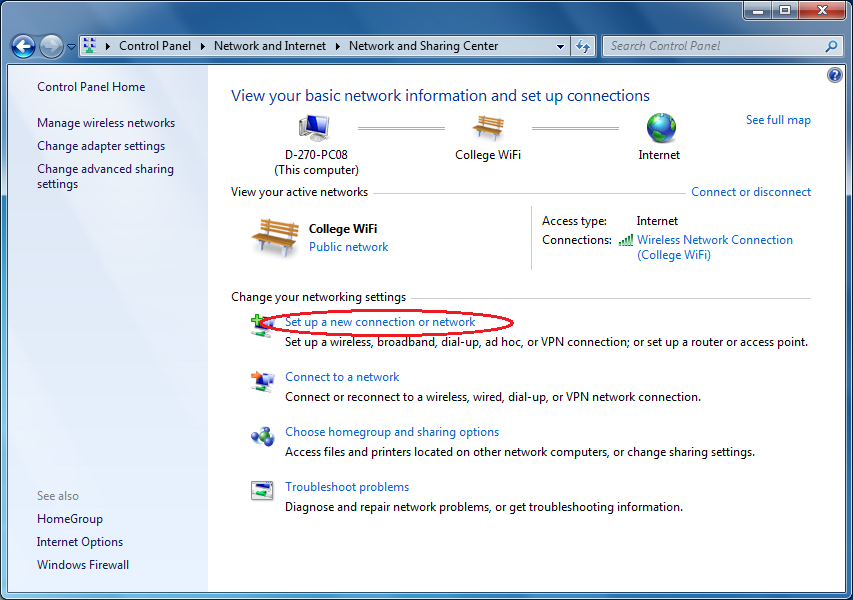
- Click the Windows Start button if the lower left and then click Control Panel in the right column.
- Click Network and Internet and then click on Network and Sharing Center. If your Control Panel is in icon view, then just double click Network and Sharing Center:

- Click Set up a new connection or network.
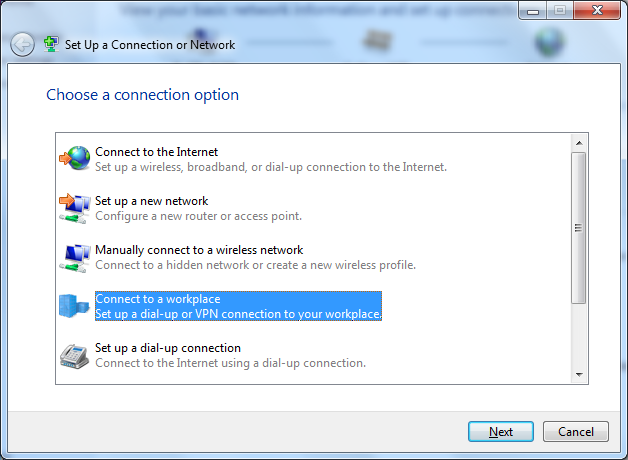
- Select Connect to a workplace (VPN Connection) and click Next.
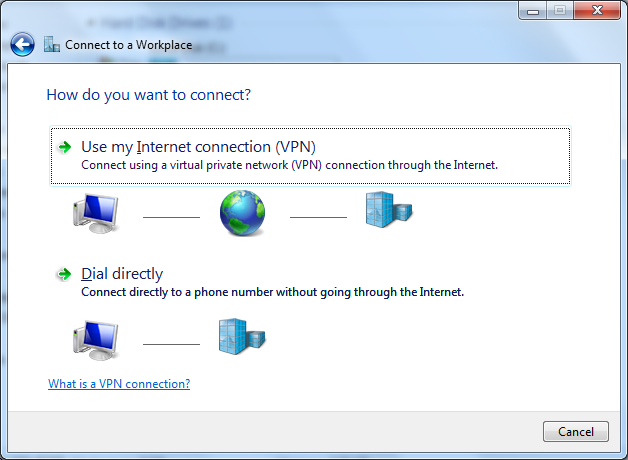
- Select Use my Internet Connection (VPN).
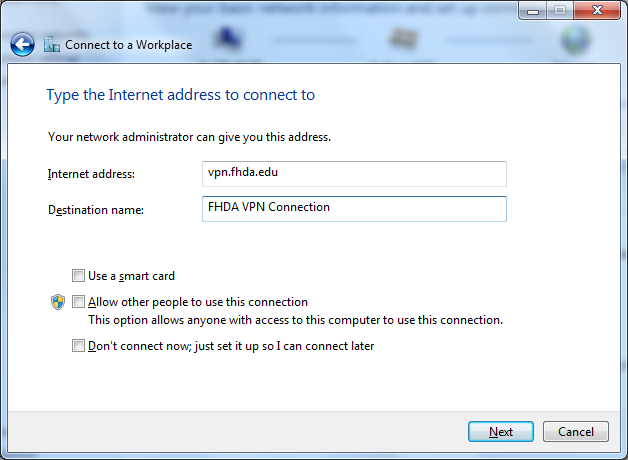
- Type in vpn.fhda.edu for the Internet address. You may name the Destination name to your preference such as FHDA VPN Connection. Click Next.
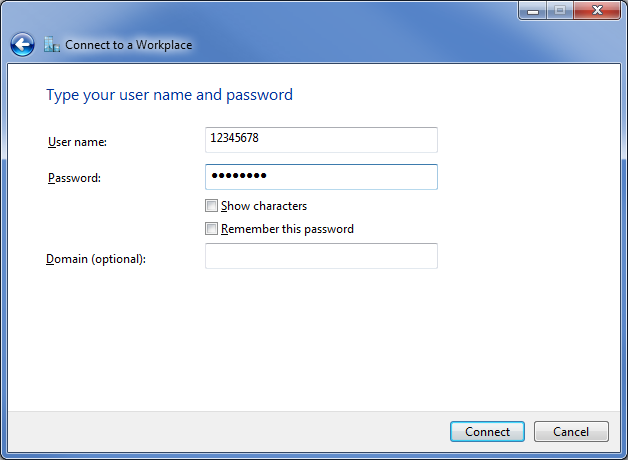
- Type in your username and password. For staff and faculty, your username is your 8 digit Campus Wide ID used also for logging into our MyPortal system. You can leave the rest alone. Click Connect.
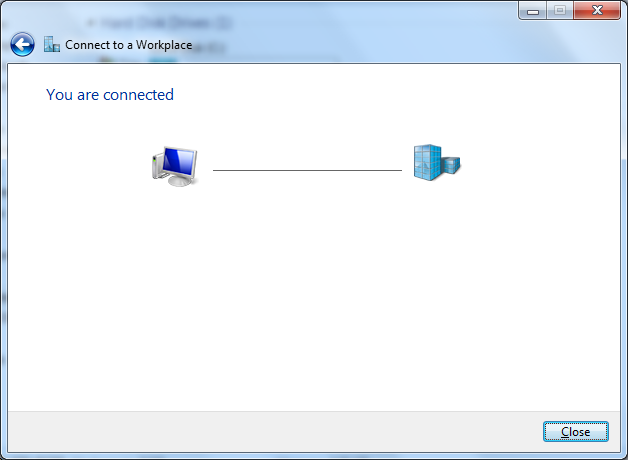
- You should now be connected. You can click the Close (X) button.
- To disconnect from the VPN or to reconnect later, click the network or wireless connection icon in the system tray of the bottom right side of the screen near the clock, select the FHDA VPN Connection item so that it highlights in light blue, then click Disconnect or Connect.

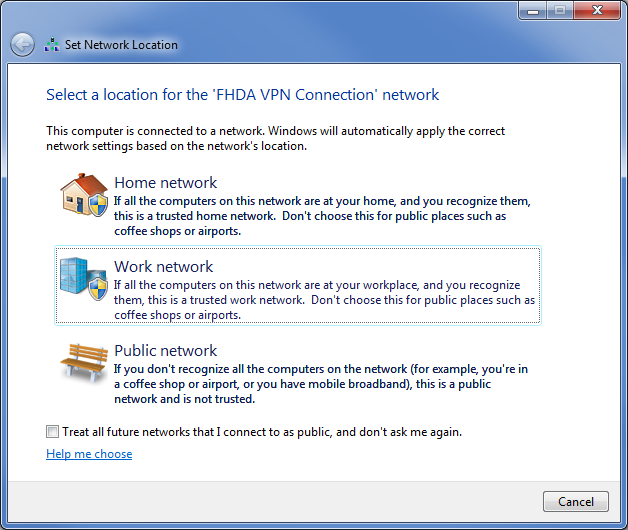
- Also, If your computer pops up a window asking for the location of the new network connection is, choose Work network.
Instructions for Windows 10
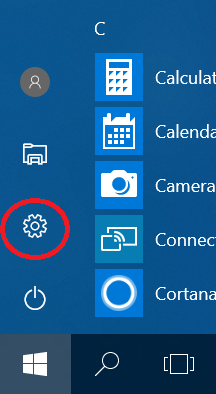
- Click the Windows Start button if the lower left and then click the Settings gear icon on the left side.
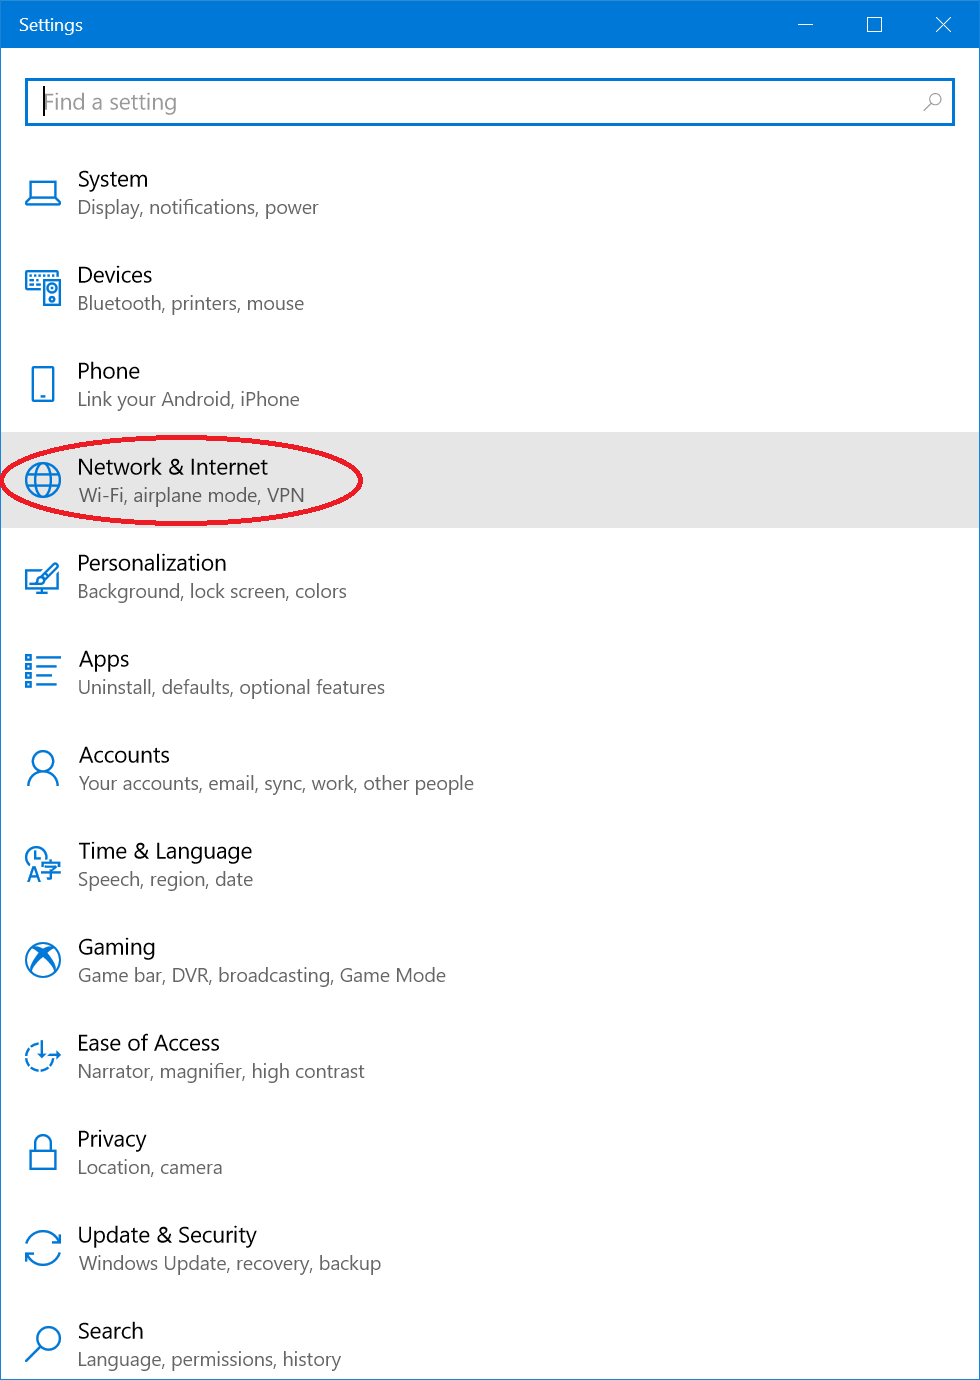
- Select Network and Internet.
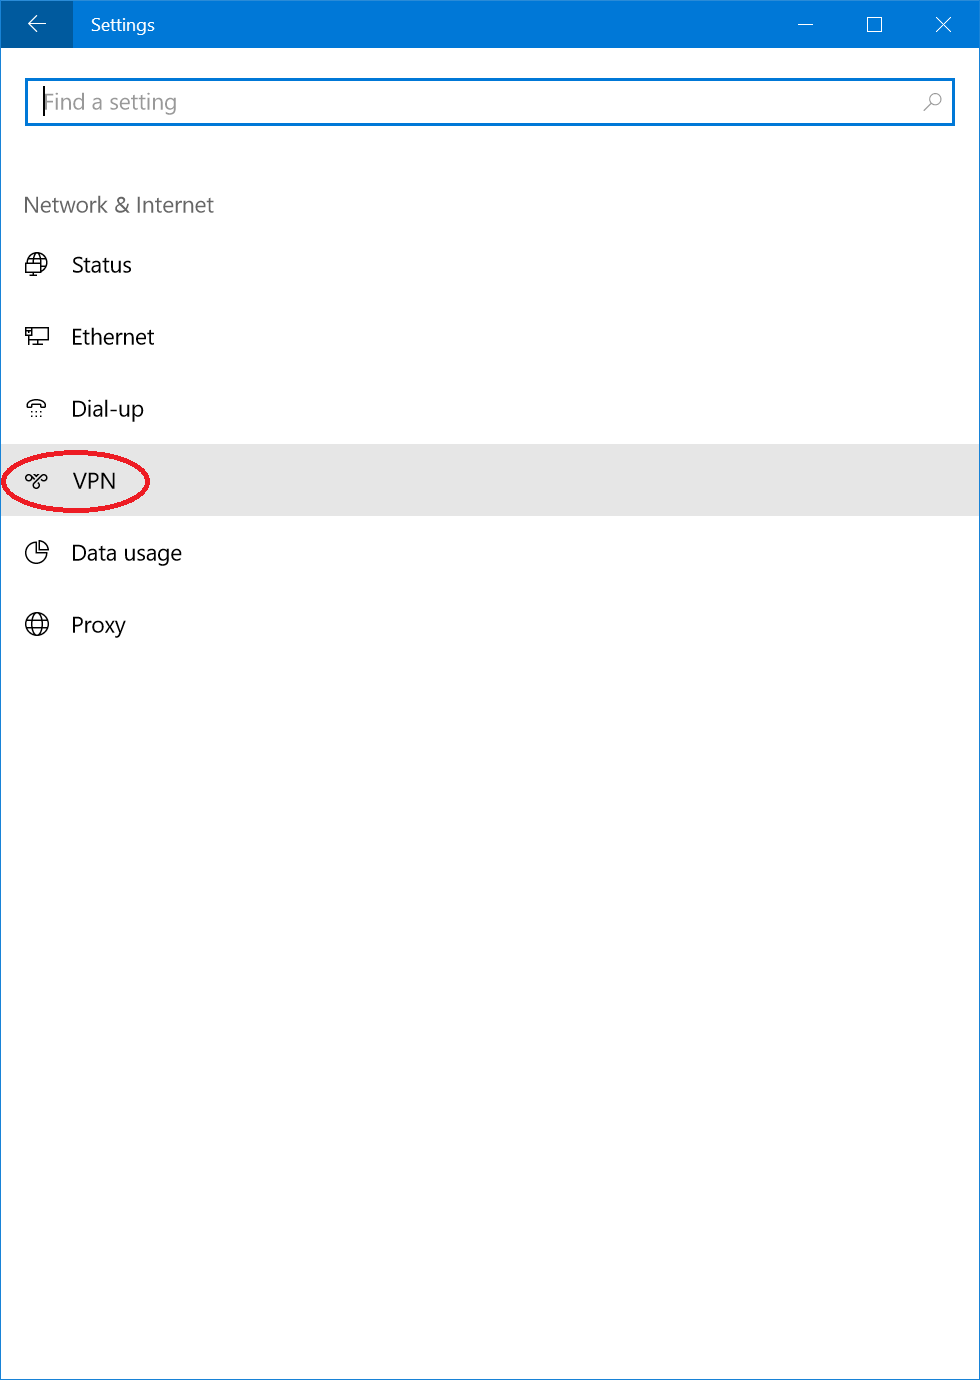
- Select VPN.
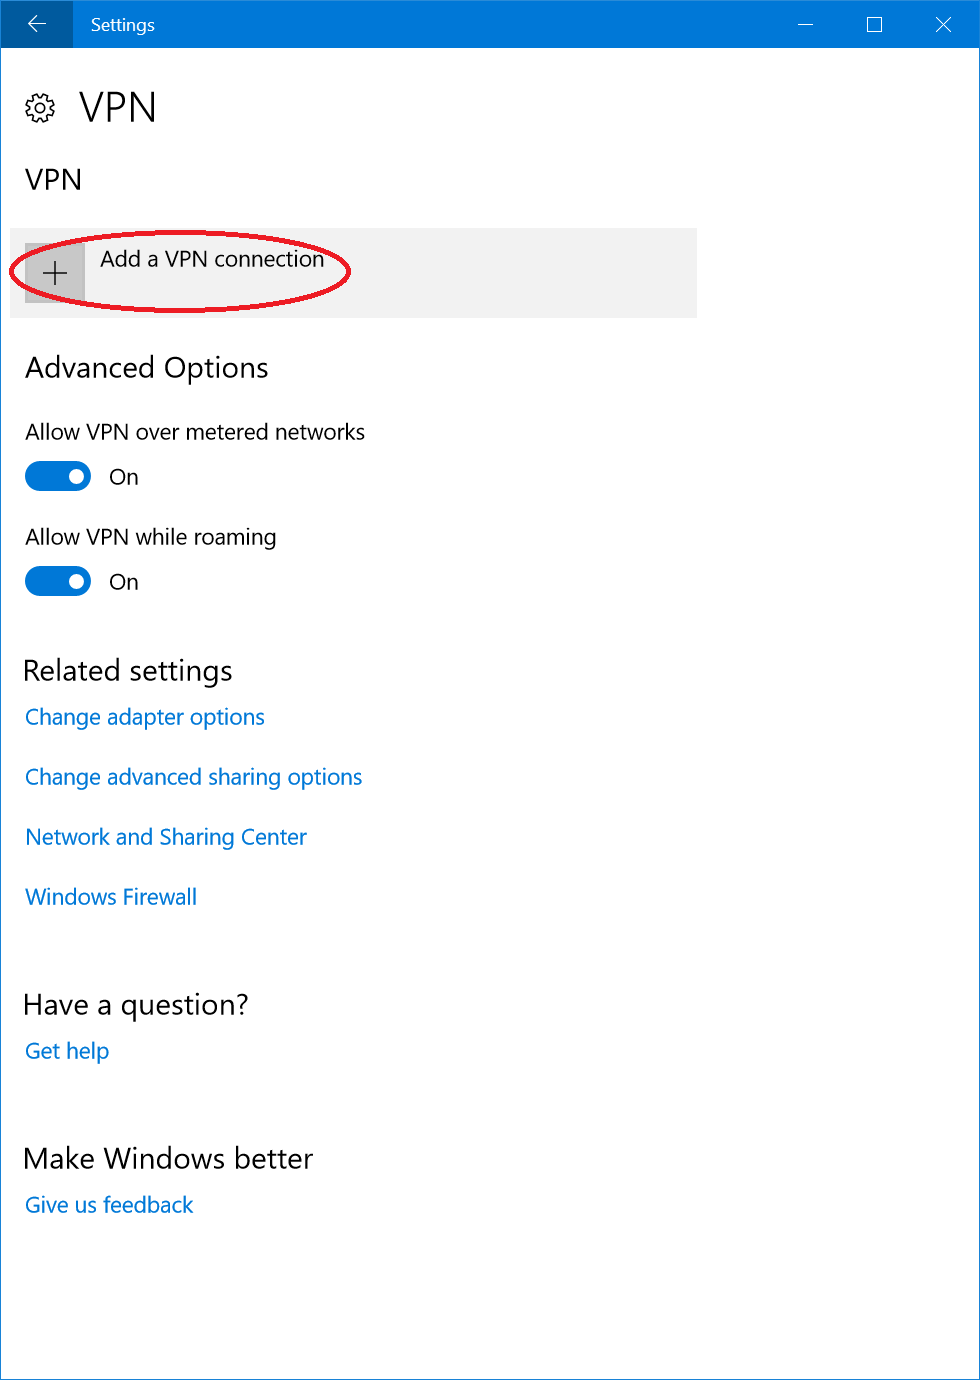
- Select Add a VPN.
- Fill in these details:
- VPN Provider: Windows (built-in)Connection name: FHDA VPN
- Server name or address: vpn.fhda.edu
- VPN type: Automatic
- Type of sign-in info: User name and password

- For better security, it is best to uncheck Remember my sign-in info and enter your credentials when you connect.
- Click Save.
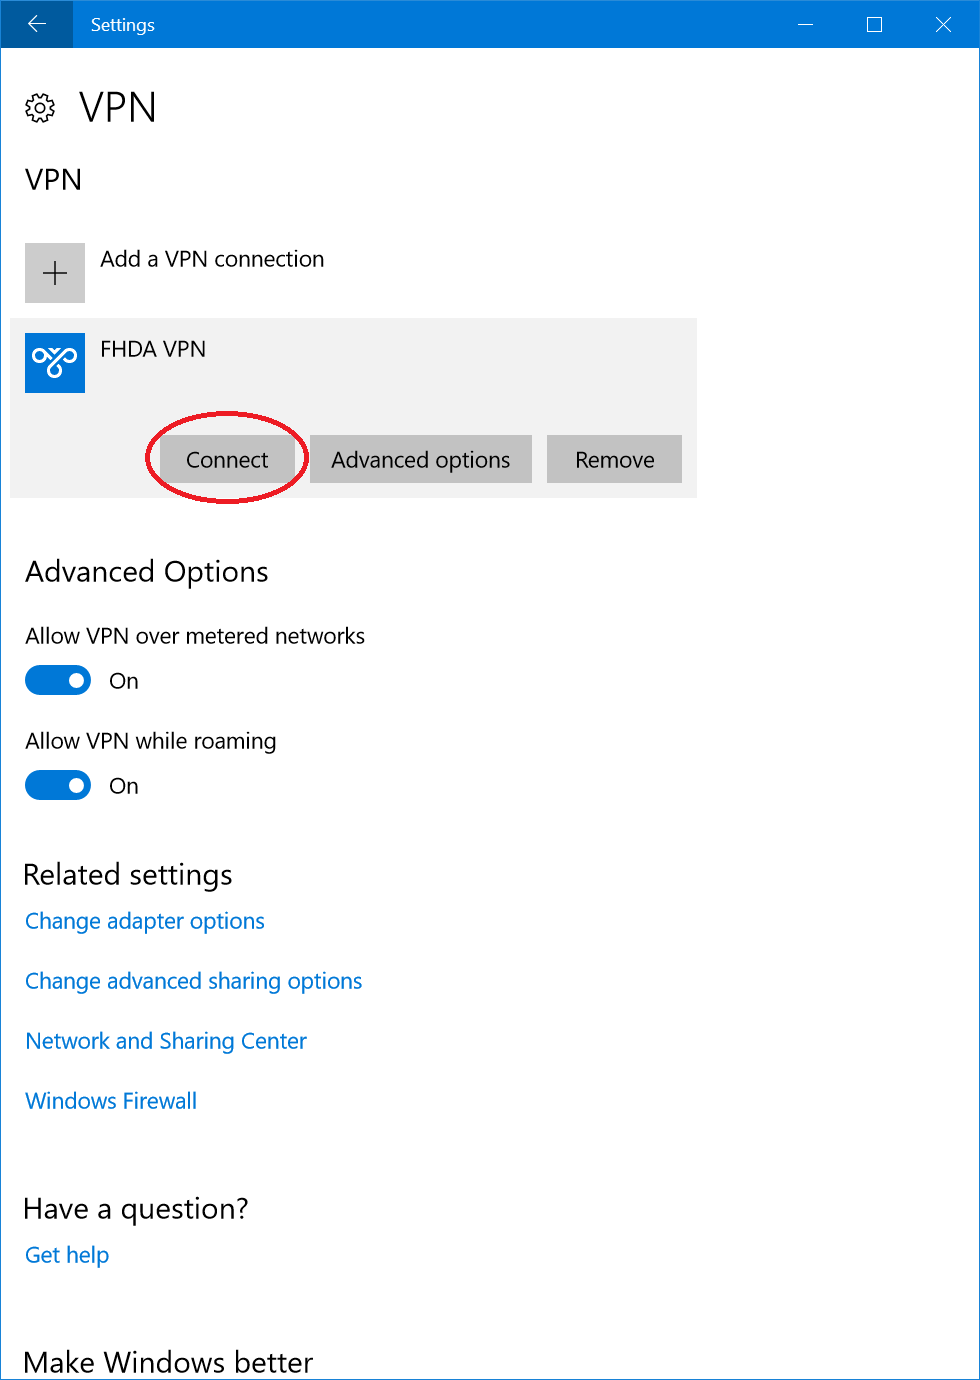
- Select the FHDA VPN entry and click connect.
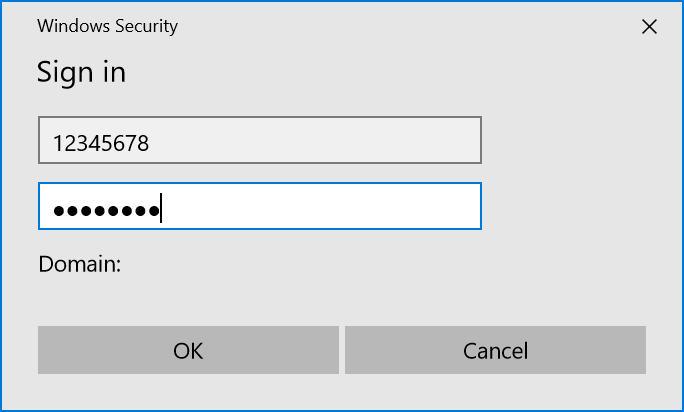
Type in your username and password. For staff and faculty, your username is your 8 digit Campus Wide ID used also for logging into our MyPortal system. Click OK.
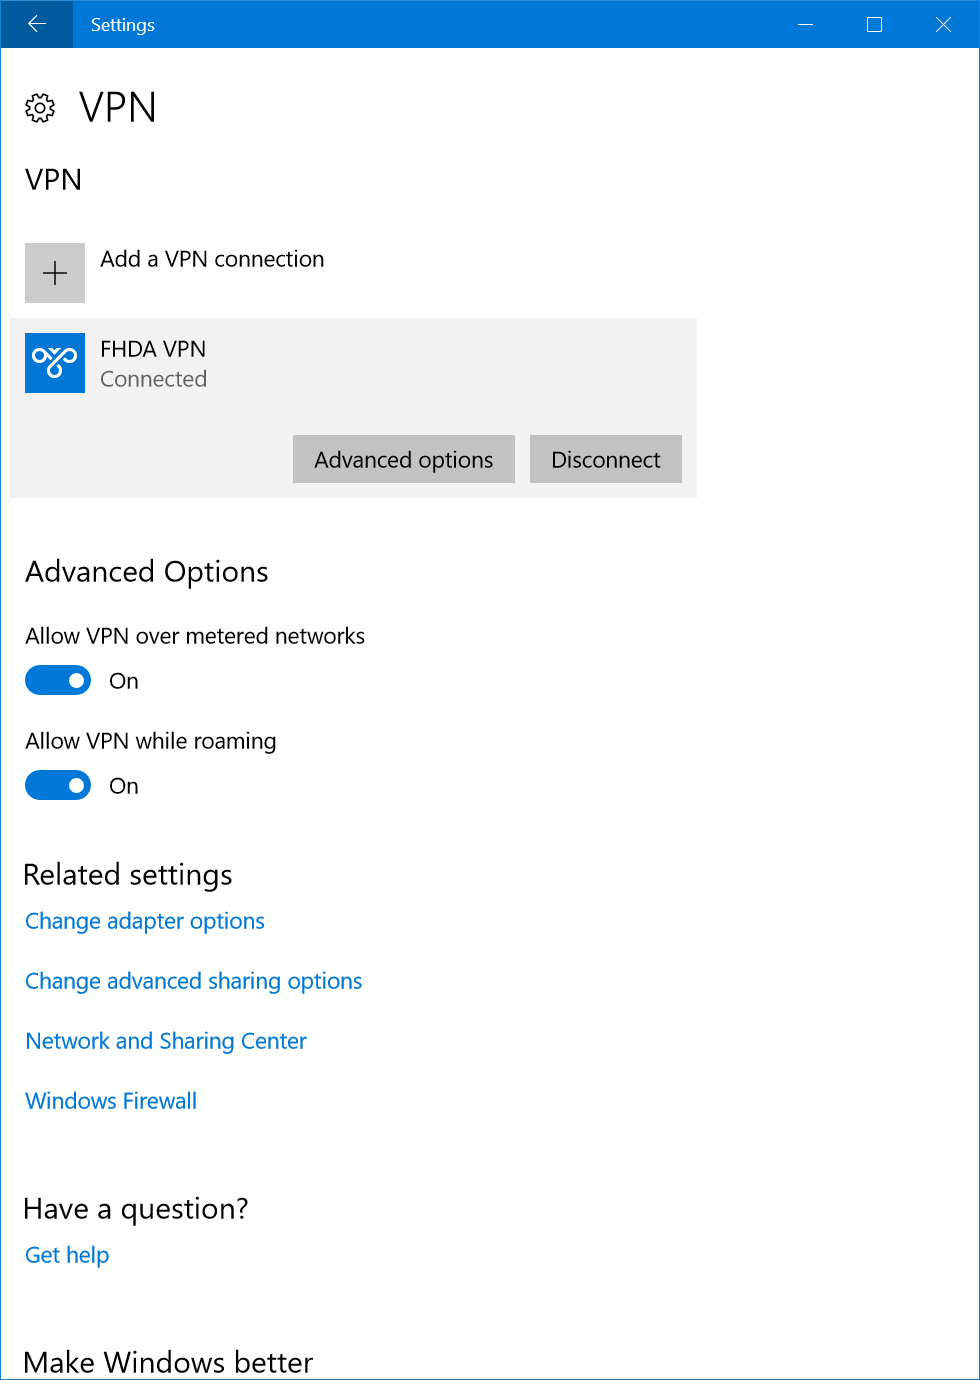
- It should now say Connected.
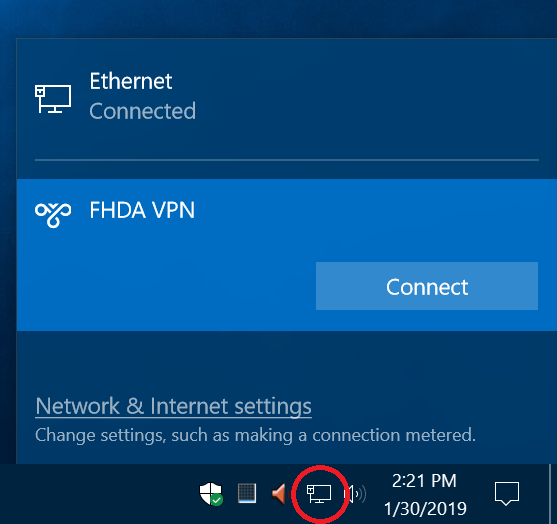
- For a shortcut to connect or disconnect from the VPN, click the network icon in the System Tray of the lower right side of the screen, then highlight FHDA VPN and click Connect or Disconnect
Instructions for Mac
Note: These instructions are for Mac OS X 10.11 and higher. Mac OS 10.11 (El Capitan from 2015) has a disconnect bug after 5 minutes and should be upgraded. Older versions will still work, but you need to follow the last step.
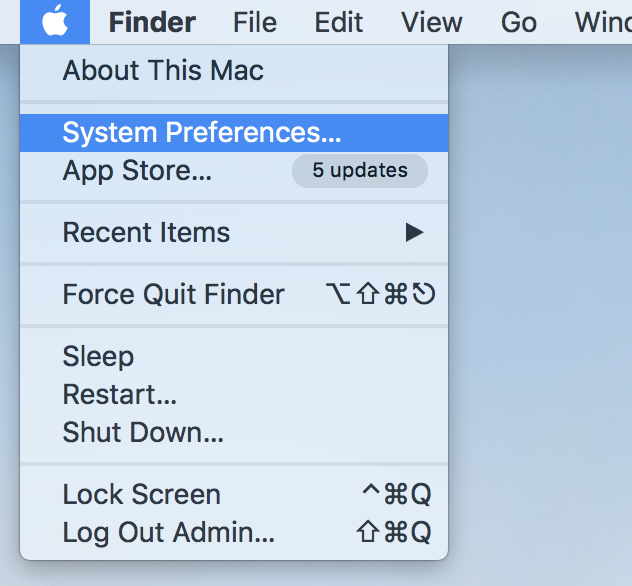
- From the Apple Menu, select System Preferences...
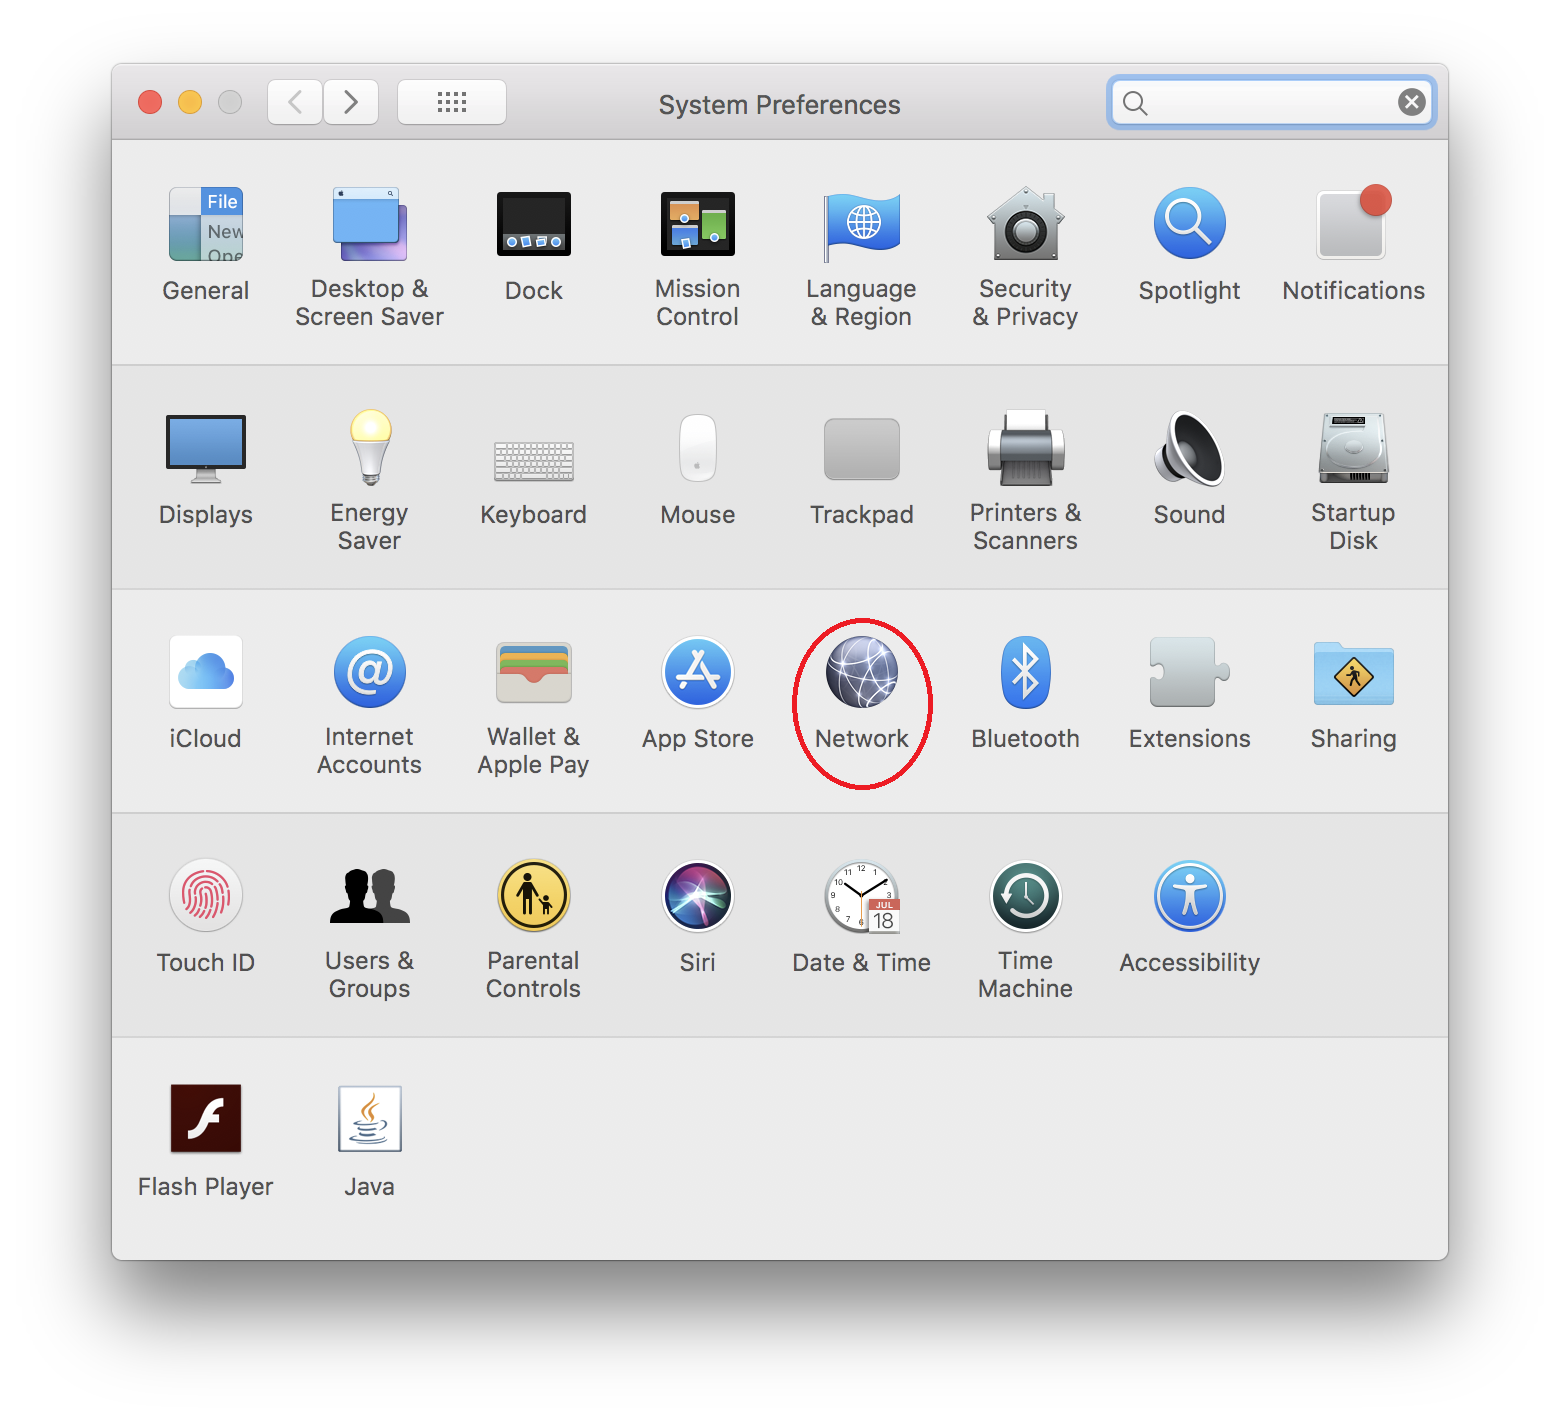
- Select Network.
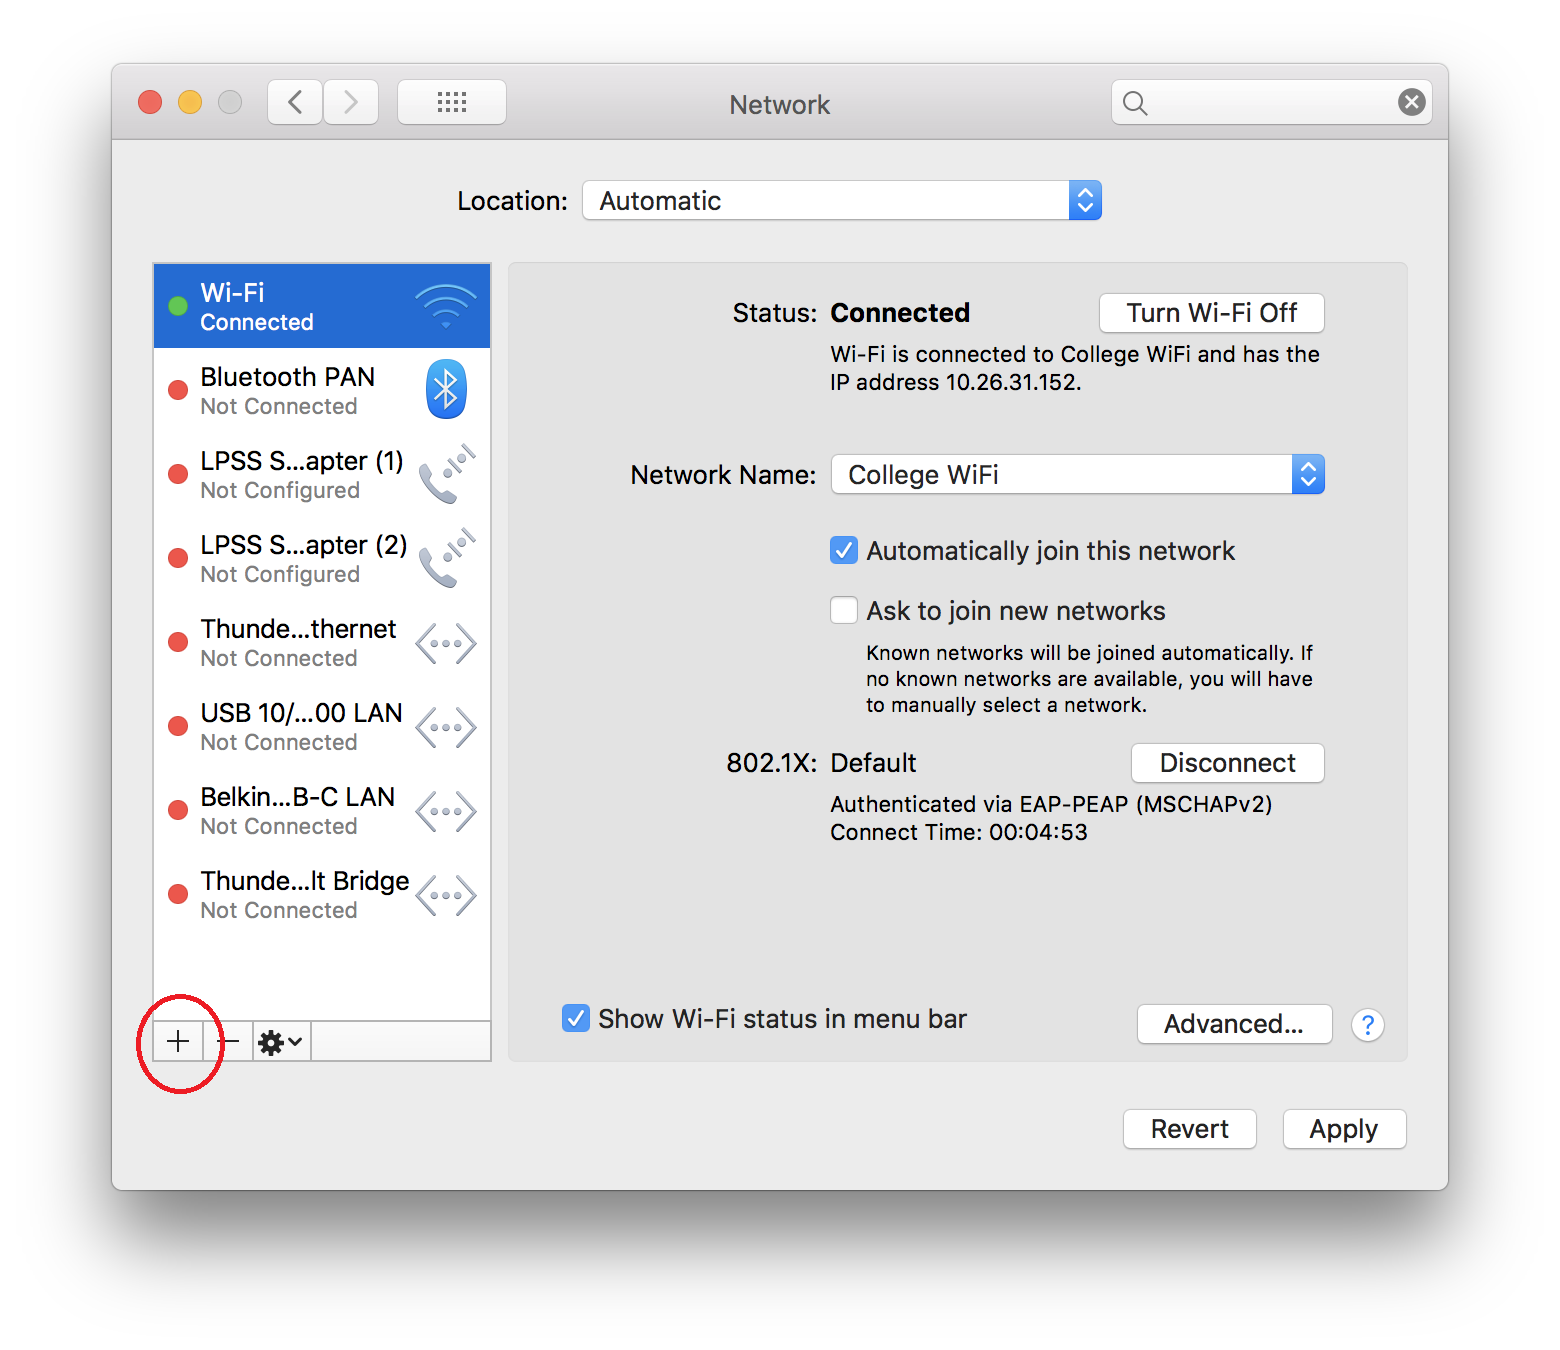
- Click the + symbol on the bottom left side to add a connection.
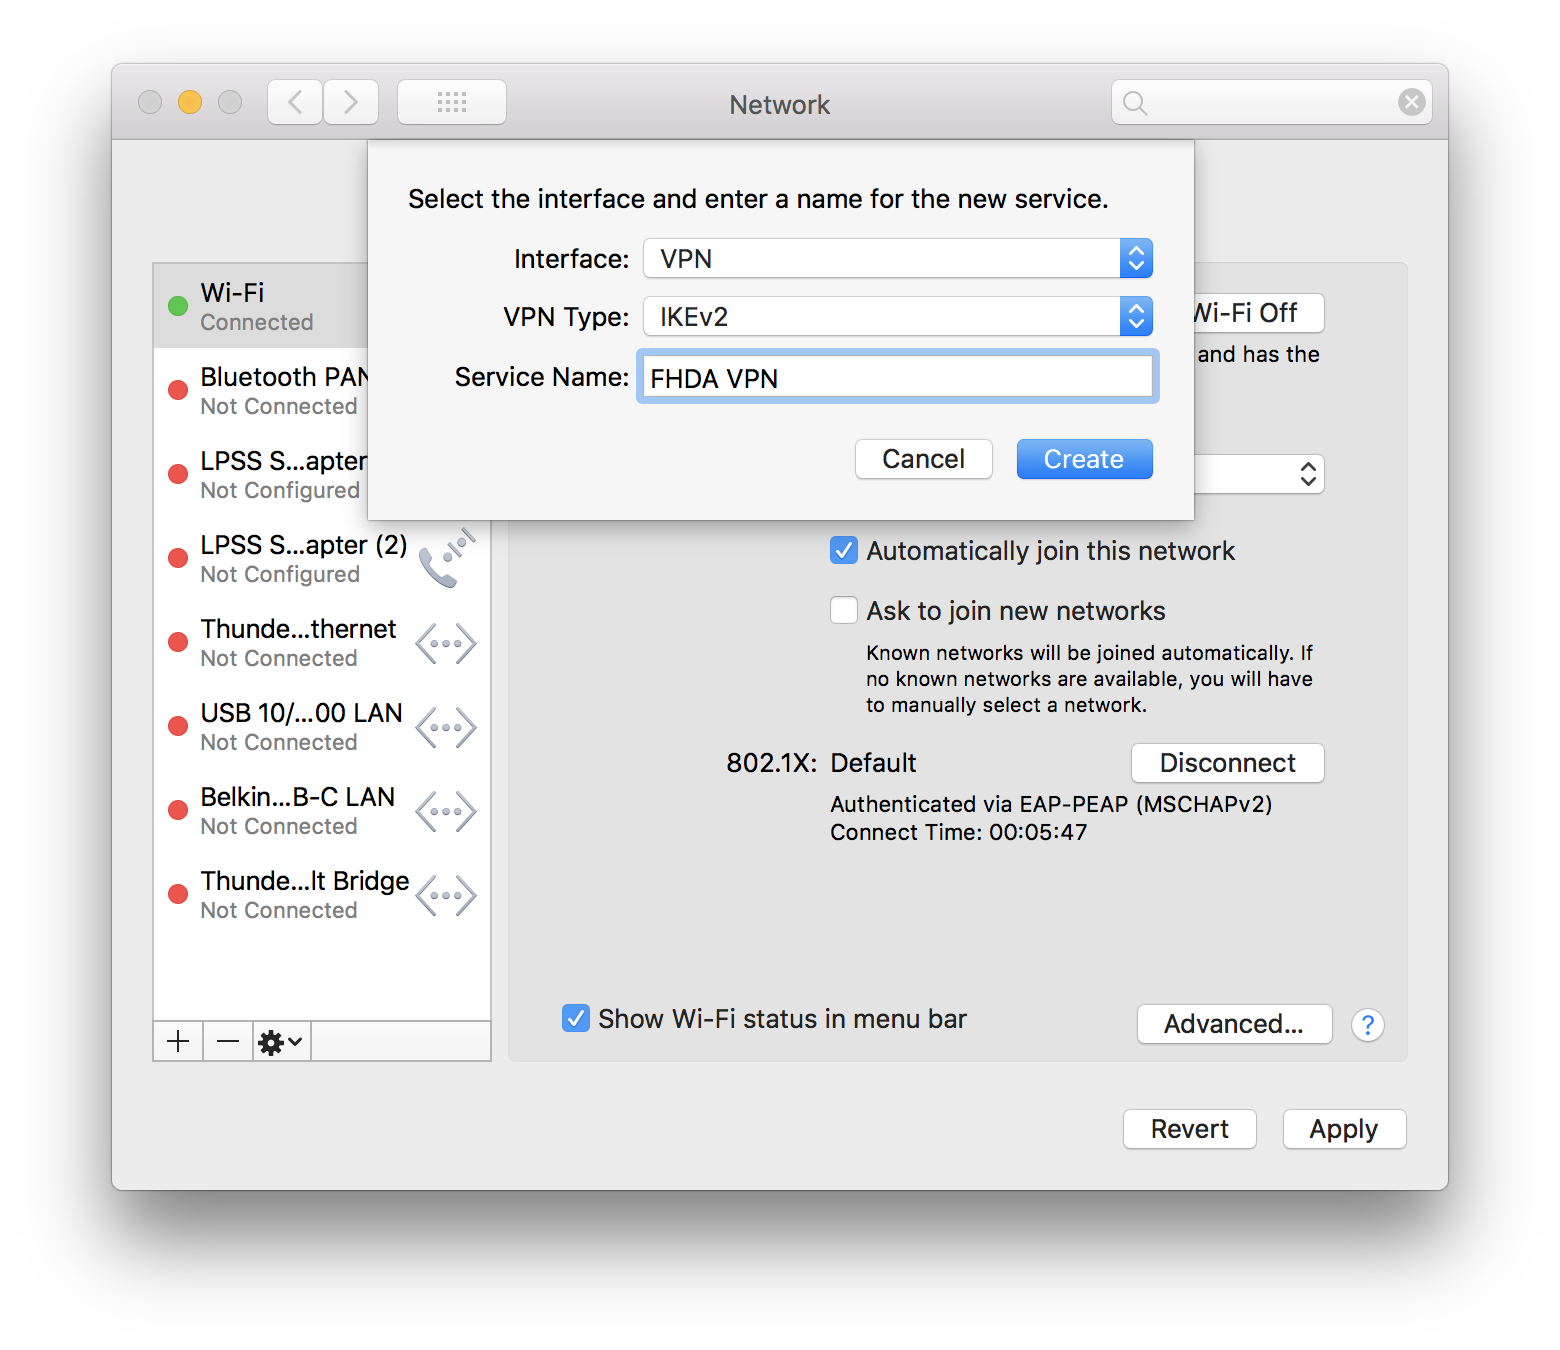
- Select or type in these settings and then click Create.
- Interface: VPN
- VPN Type: IKEv2
- Service Name: FHDA VPN
- Follow these steps:
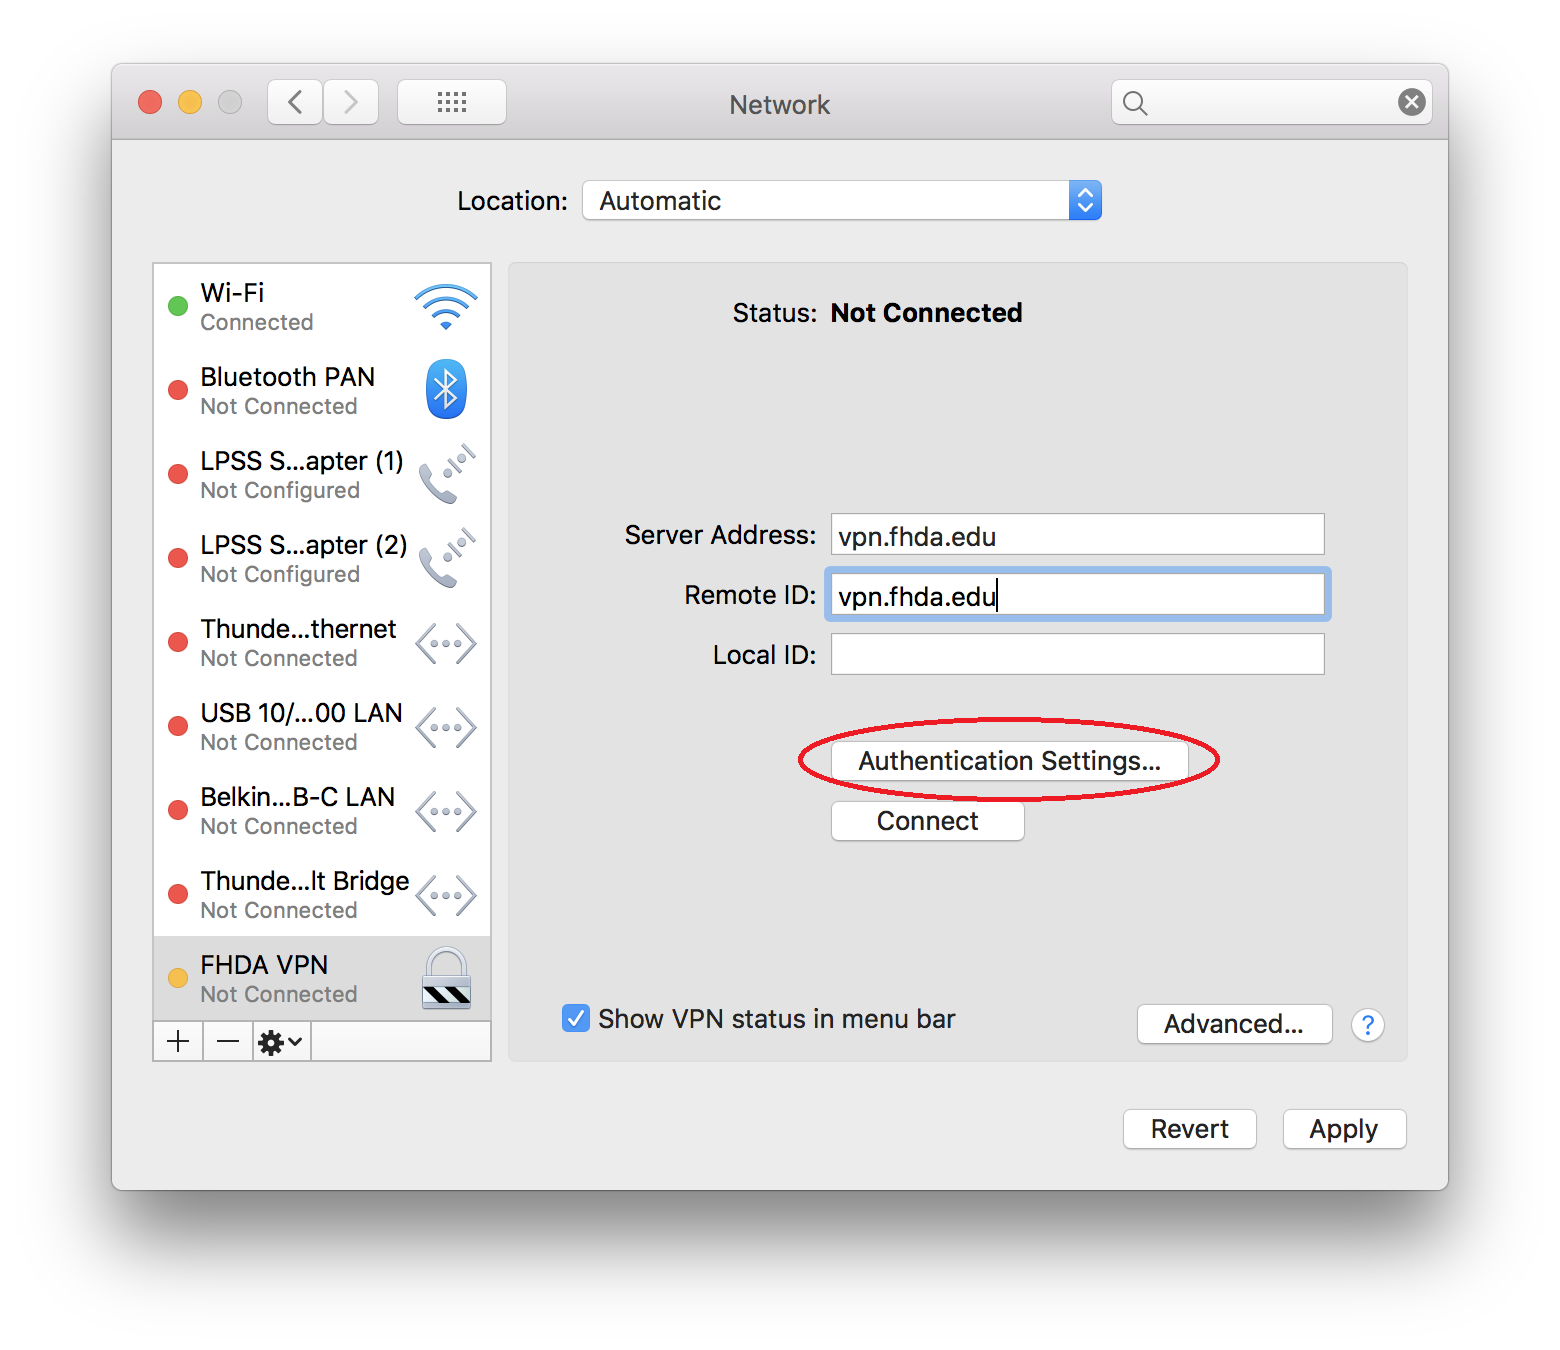
- For Server Address, enter: vpn.fhda.edu
- For Remote ID, also enter: vpn.fhda.edu
- Click Authentication Settings...
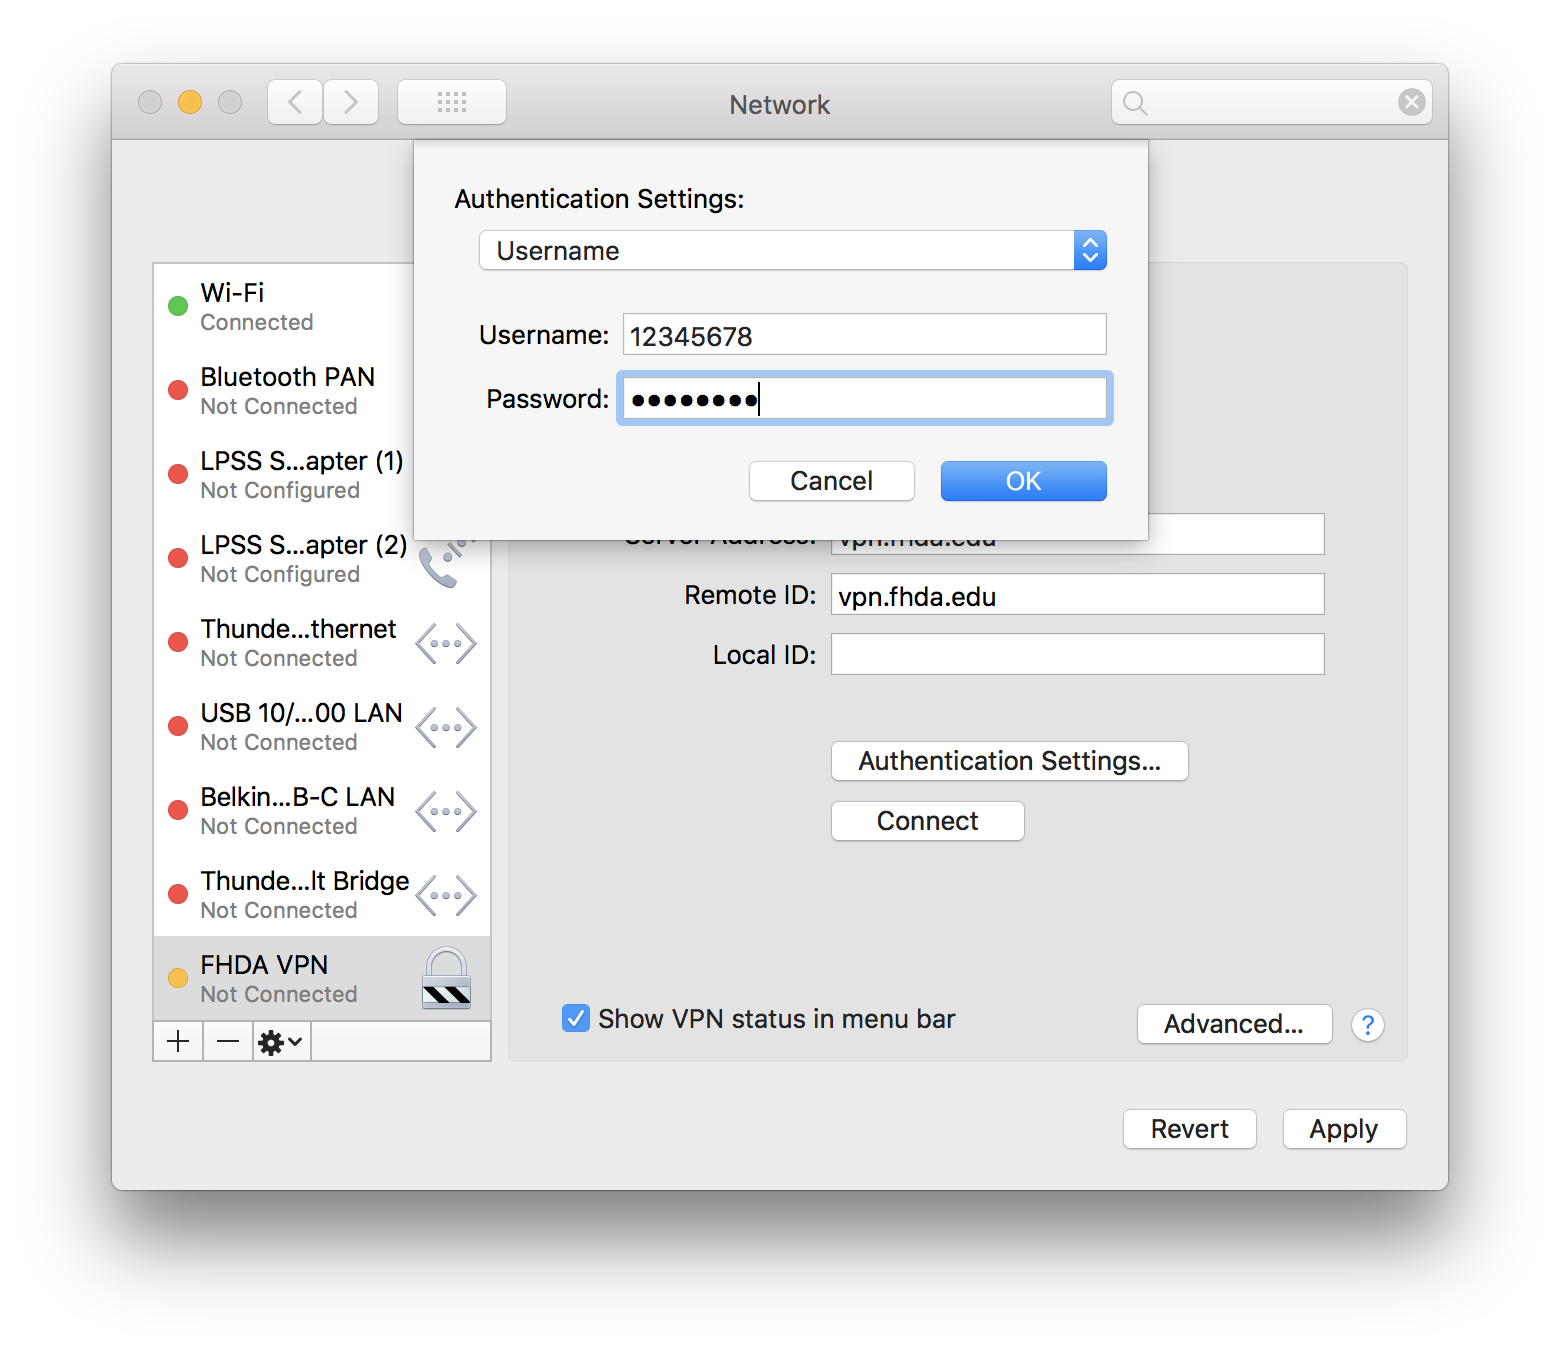
- Make sure the Authentication Settings is on Username. Type in your username and password. For staff and faculty, your username is your 8 digit Campus Wide ID used also for logging into our MyPortal system. Your password is also the same password used to login to our MyPortal system. Click OK.
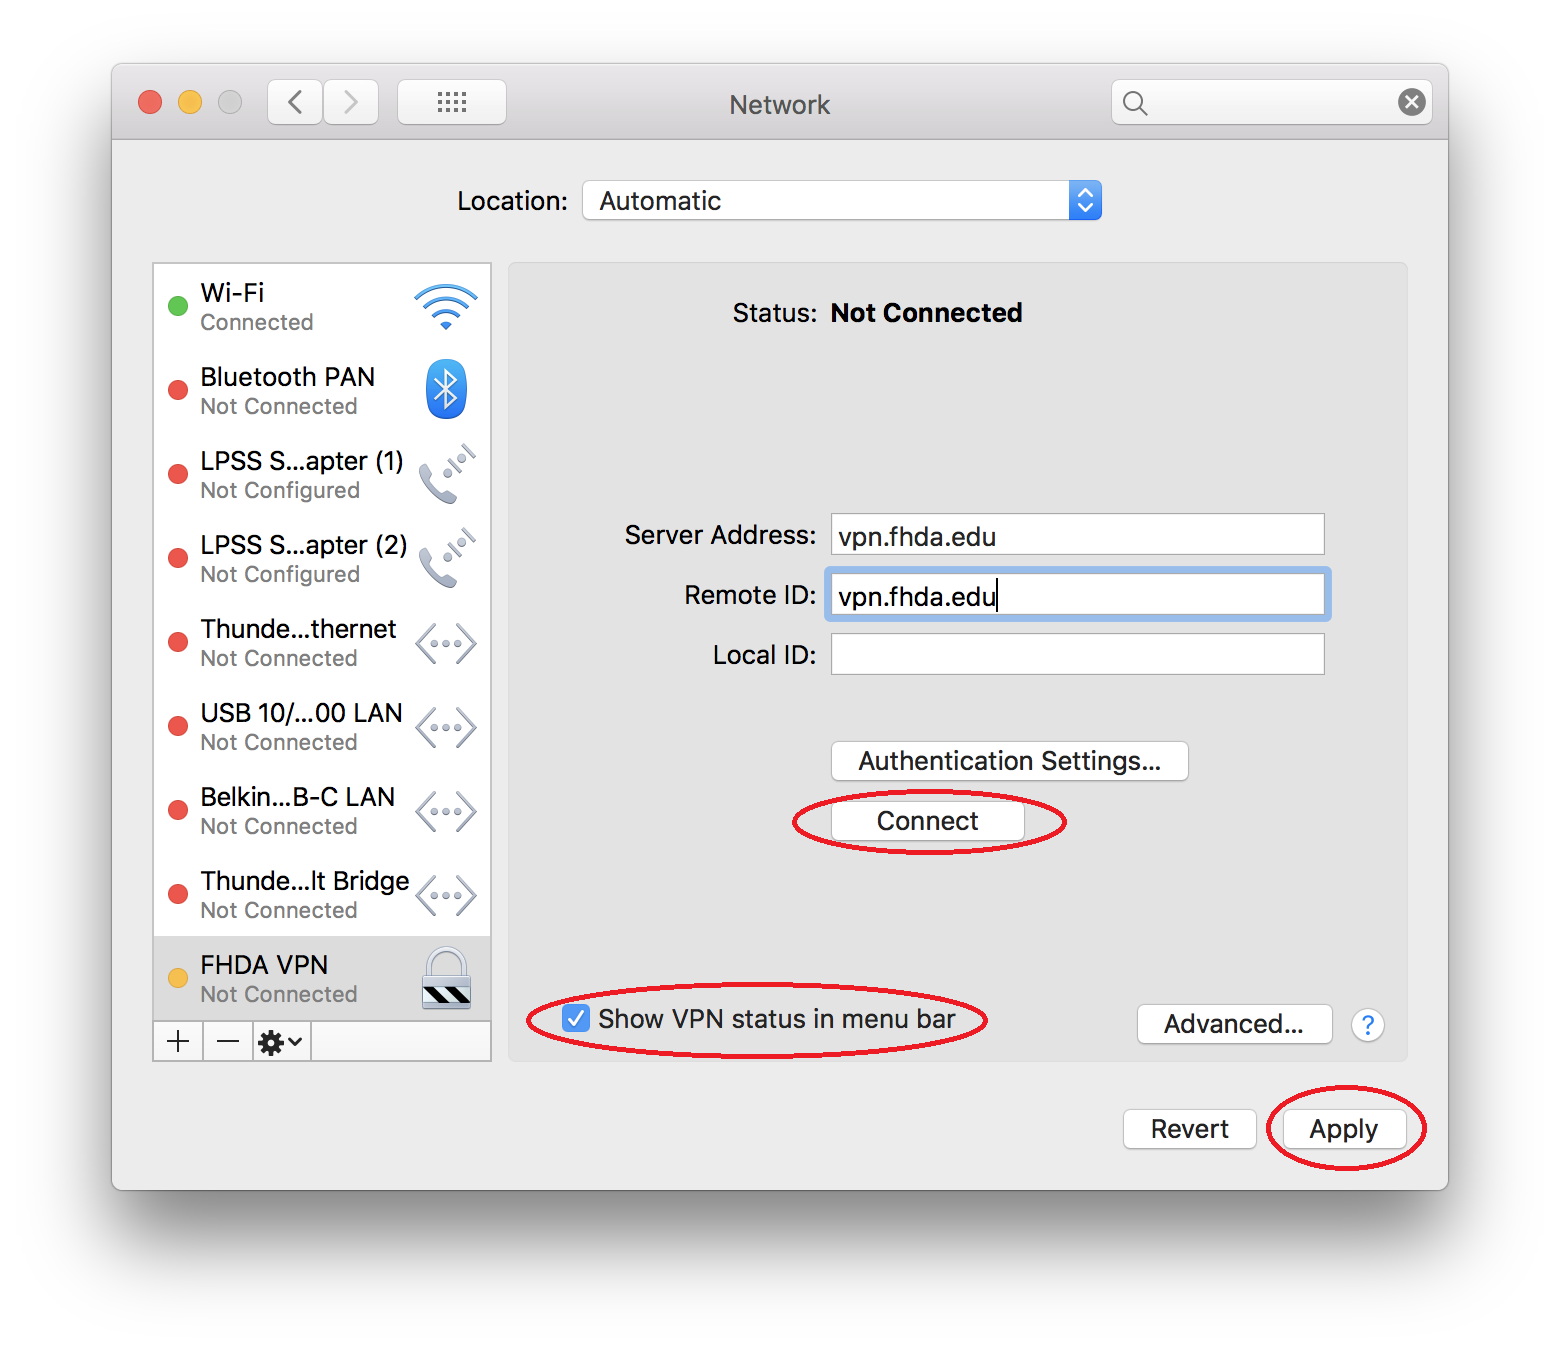
- Select the checkbox next to Show VPN status in menu bar. Click Apply, then click Connect.
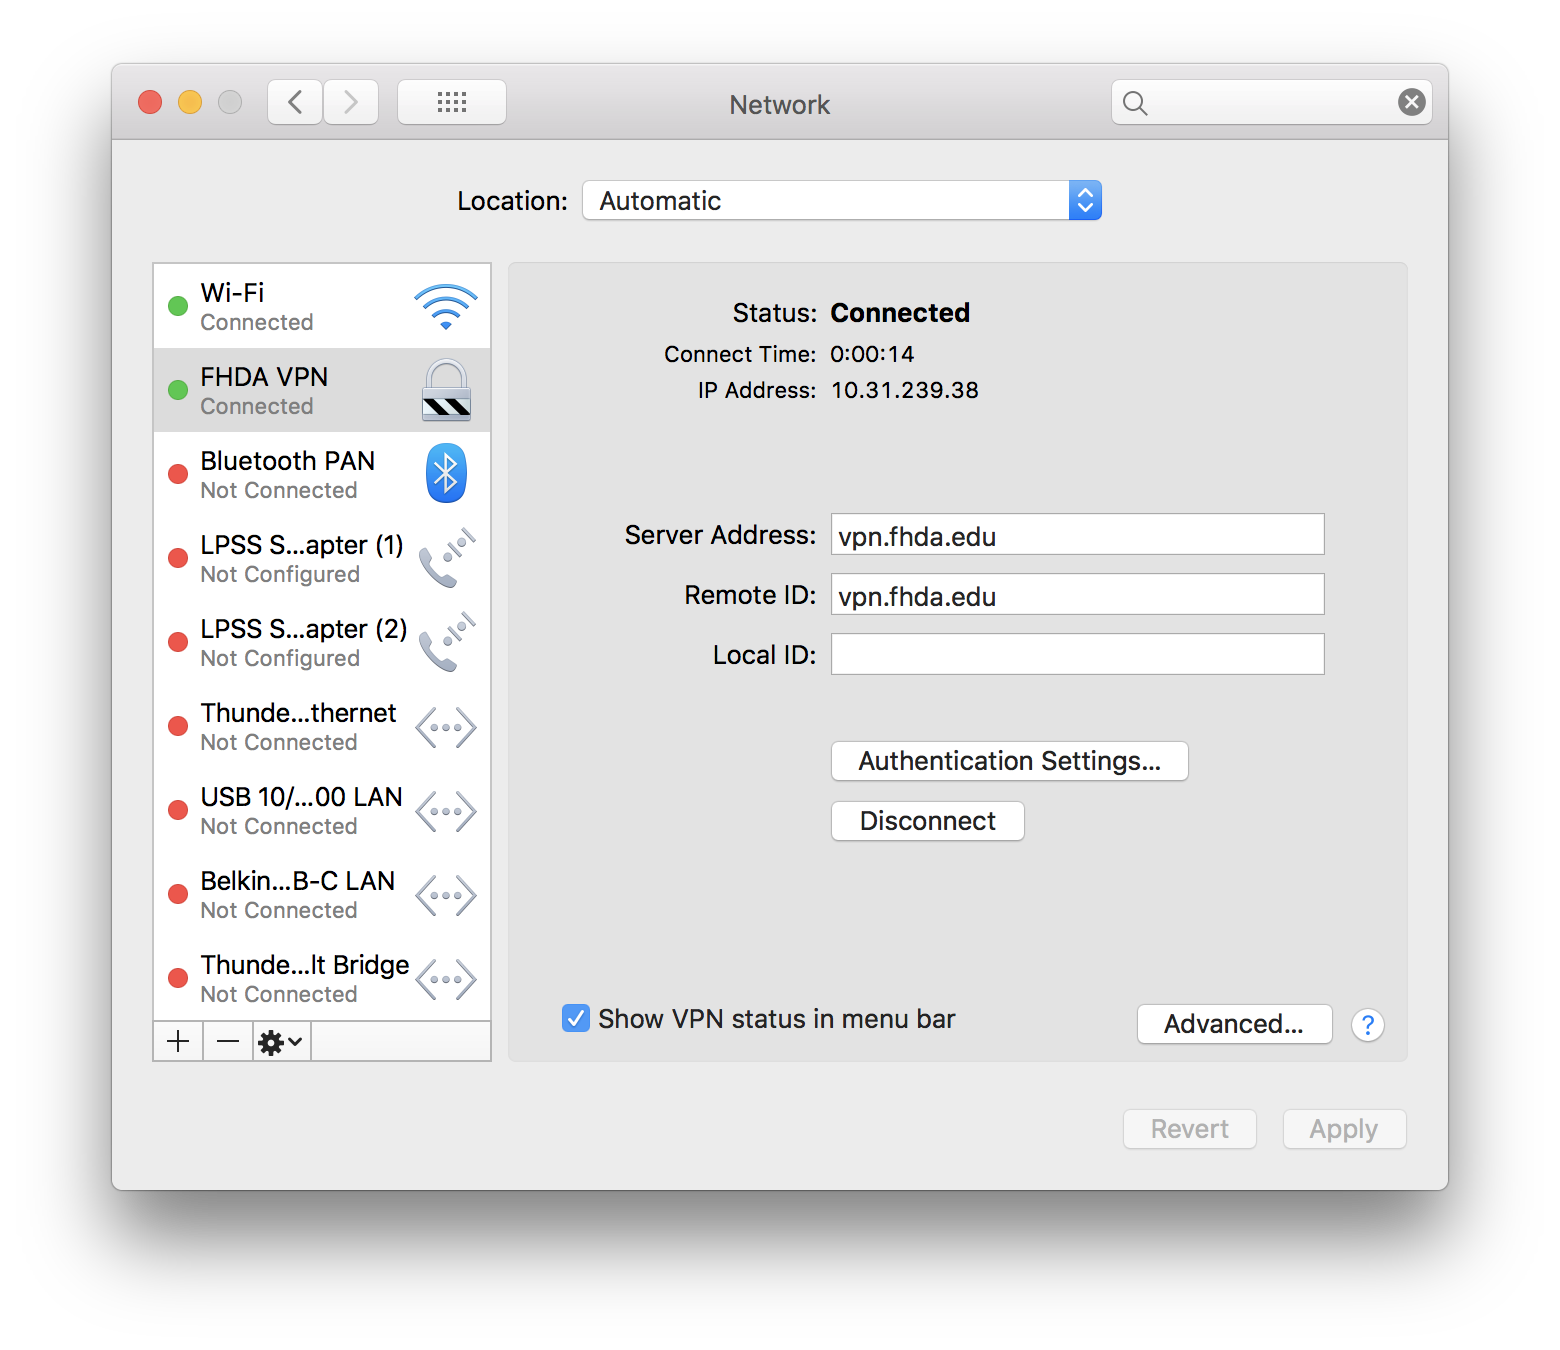
- It should now show a status of Connected.
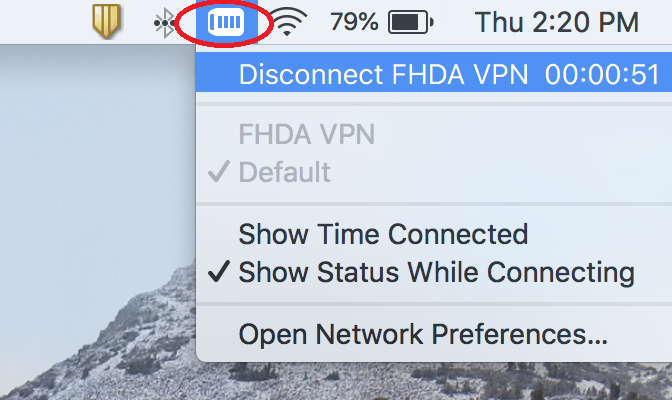
- To easily connect or disconnect from the VPN, use the icon up in the menu bar and select Connect or Disconnect FHDA VPN.
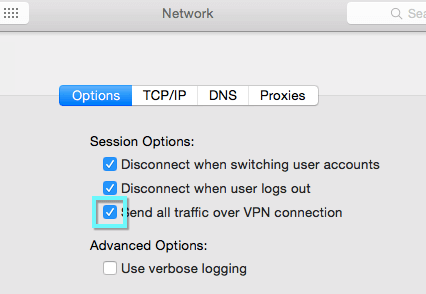
10. Older Mac OS X versions (10.10 and below) only: In the network settings, there is an Advanced button that brings up these options. You need to check the setting "Send all traffic over VPN connection"