Banner 9 Online Help, Shortcut Key
- Jyoti Gavali
Introduction
Banner 9 also known as Admin Pages, is designed to improve user's experience with new tools, a "Google like" search option and offers easier navigation between pages. It eliminates web browser compatibility issues. The following document discusses the icons on the Application Navigator, basic elements of banner 9 web display such as pages, sections and the menu options on the page header, section header, section navigation controls.(footer), quickflow and steps to a Job submission.
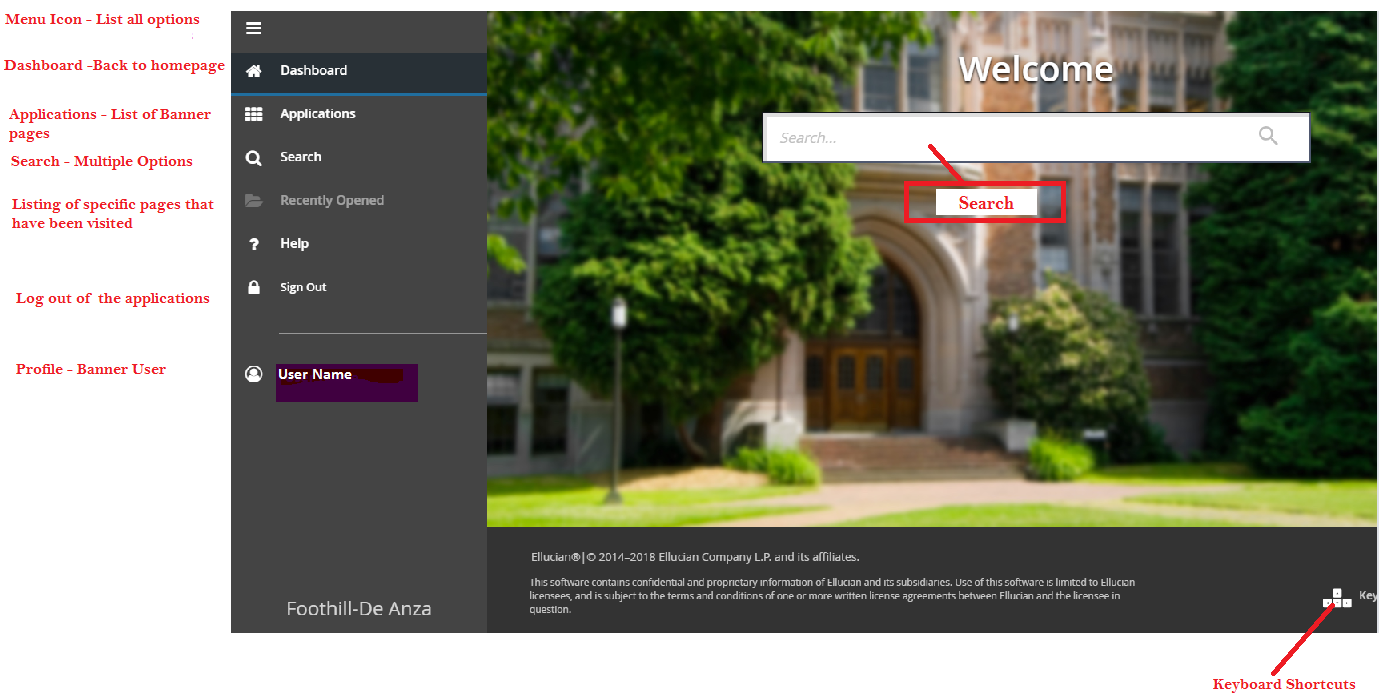
Navigation and Welcome page/Landing page introduction
- Search box in the center of the page (CTRL+Home) – Search for forms, pages, jobs/Banner acronym, menus and quickflows by entering 3 or more characters "Stu" in the Search field.
The Application Navigator/AppNav is at the left of every Banner web page.
Banner 9 Page Elements

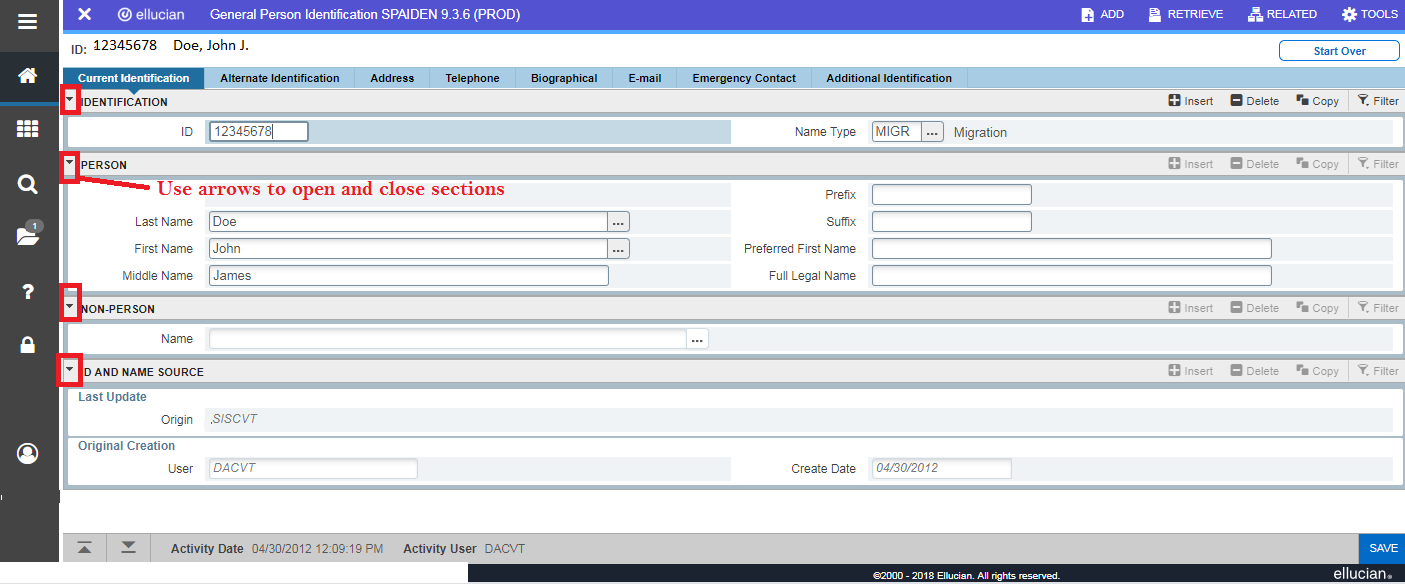
Page Header
Forms are now pages and Blocks are now sections

1. X: Page close icon
2. Page Title: 
3.& 4 Add and Retrieve Icons: Used to add and retrieve documents.
Shortcut to Add documents: [Alt-A]; shortcut to Retrieve documents: [Alt-R]
5. Related Menu: Displays a list of pages that can be accessed from this page.
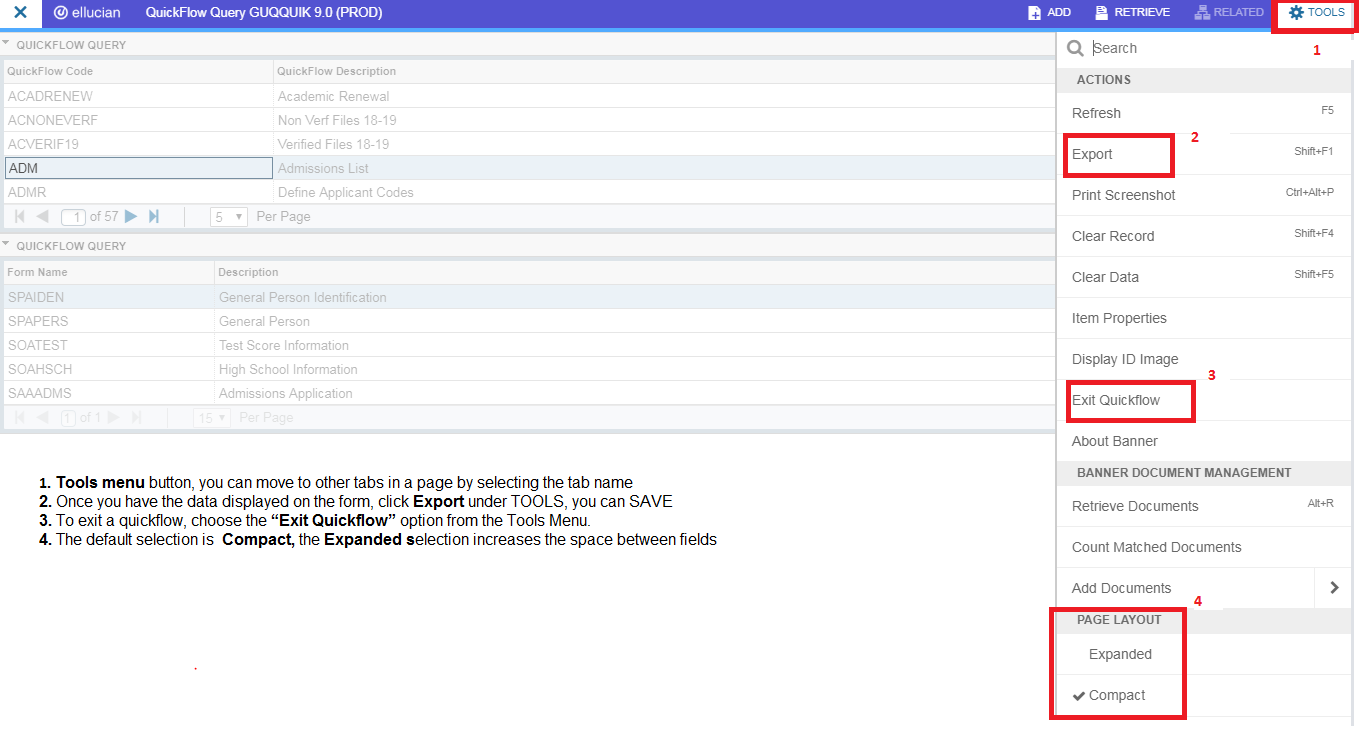
6. Tools Menu: Includes Refresh, Export, Print, Clear Record, Clear Data, Item Properties, Display ID Image, Exit Quickflow, and About Banner. Will also include other options controlled by the page, such as Banner Document Management.
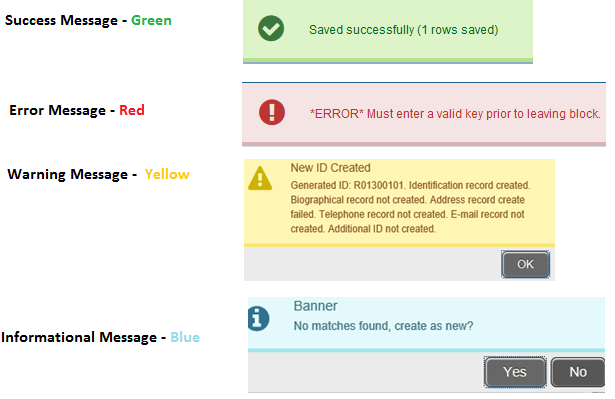
7. Notification Center: If there are messages for the page, this block will appear. The number of notifications will be listed. You can toggle them off and on. See Section 3 – System Messaging for more information.
Key Block

1. Enabled Key Block: The first block on most pages contains key information. Enter required information, then click Go to activate the page.
2. Go button: Moves you out of the Key Block. Shortcut: [Alt-Page Down]

To enter a different data, click Start Over, located in top right corner of the page
Section Area
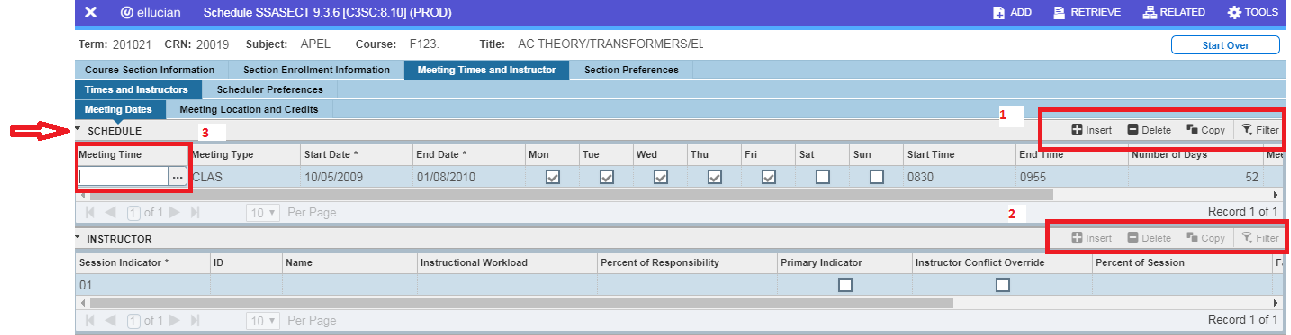
1. Activated Functions
a. Use Insert to add a new, blank row below your cursor.
b. Use Delete to delete the highlighted row.
c. Highlight a row/record you want to copy and use Copy to duplicate the data to a new row below that Banner inserts.
d. Use Filter to narrow down the number of rows displaying by qualifying search criteria.
e. (Header Section) Arrow + Section Name: Click the arrow or section name to collapse and expand the section
2. Functions Grayed out/Inactive Functions
3. Cursor for user input
Related Menu Button
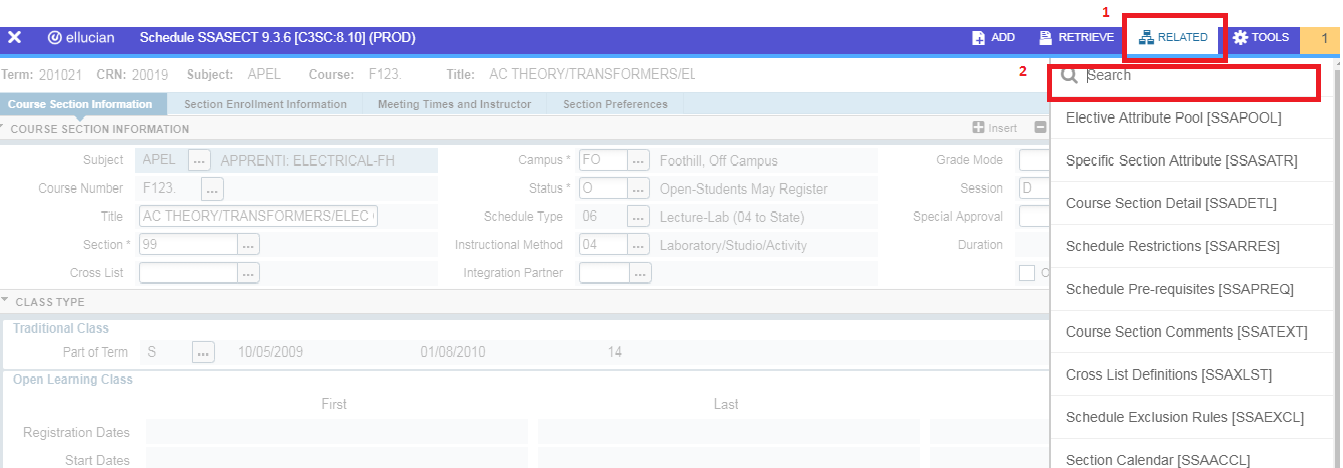
1. The Related menu button – provides easy access to pages associated with the current page.
2. This menu is searchable using the magnifying glass space at the top. Just type to search for a page name or
description
Tools Menu Button
Quickflows: Enter "quickflow" in search box or by going to the form: GUAQFLW.
Section Navigation Control & Page info or Page footer

The page footer provides access to additional navigation tools and information.
1. Next Section / Previous Section icons: Known as Previous Block or Next Block in Banner 8, use these icons to move between sections or tabs on a page.
2. Record Count: Indicates the number of records displayed.
3. Table/Field Name: Displays at the very bottom of the page for quick reference.
4. Save icon: A major difference between Banner 8 and Banner 9, the Save button is located at the bottom of the page.
Job Submission
1.From the Application Navigator Welcome page, input the Job Name (e.g: SARACTM) & click Enter
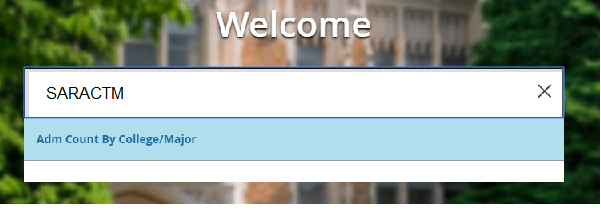
2. The user is directed to Key block. Click Go

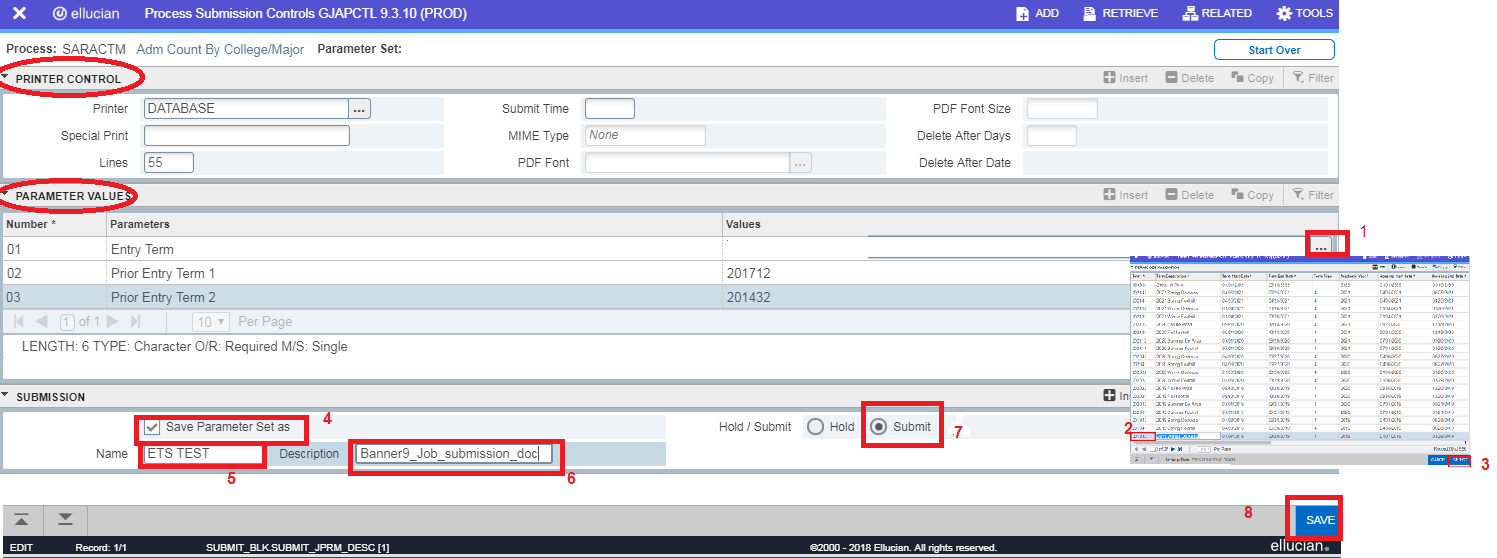
3. Steps to running the process
Enter values in the PRINTER CONTROL section
In the PARAMETER VALUES section
1. Click the Lookup Icon and a list of values are displayed
2. Select a value of choice
3. Click Select button and the value will appear on the form
4. Check box the "Save Parameter Set as"
5. Enter a unique name
6. Enter a description
7. Click on the Submit Radio button
8. Run your Banner process by clicking Save or F10. (Save button in the lower right)
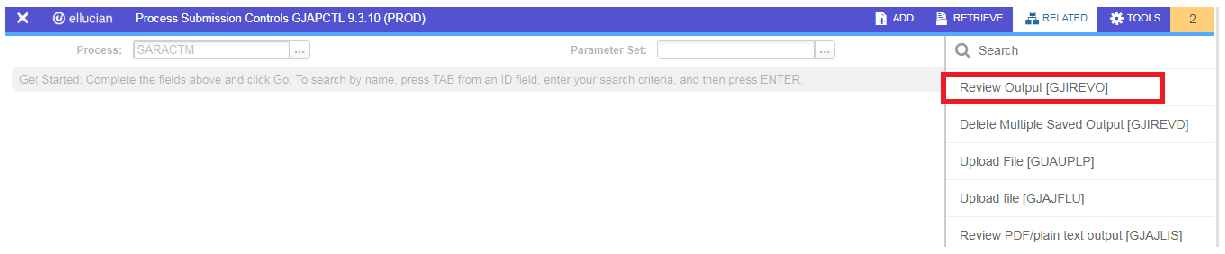
4. Accessing the output for the process run
Upon clicking SAVE button, the process is executed and a Notification appears with the job number and files
Close the Notification by clicking on the 2 in the upper right corner
Click the RELATED icon.

5. Selecting the output file
Select Review Output [GJIREVO] by clicking on it in the Related dropdown menu or highlight the drop-down menu item
& then hitting Enter.
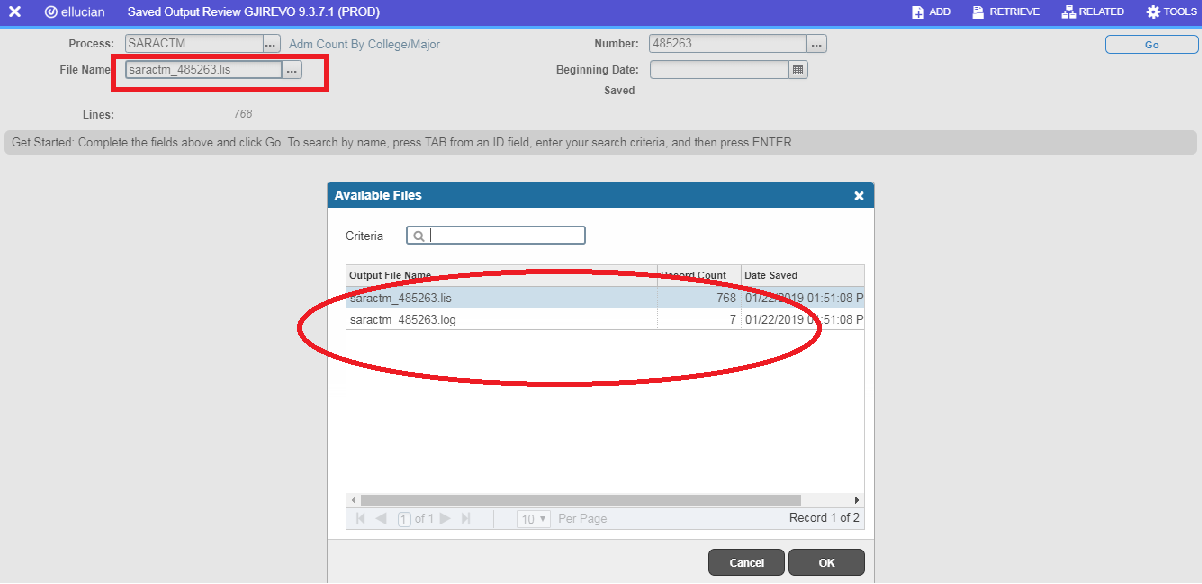
6. Viewing the output file
The GJIREVO form displays the Process name, Number, output file name as in the earlier Notification.
To view the output, select the File Name (via F9 or clicking the a file from the table) and Click OK button or hit enter..
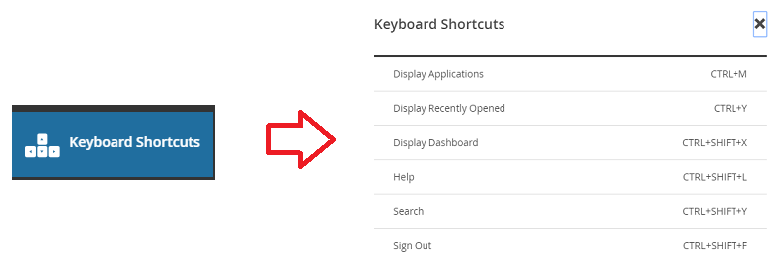
Notifications
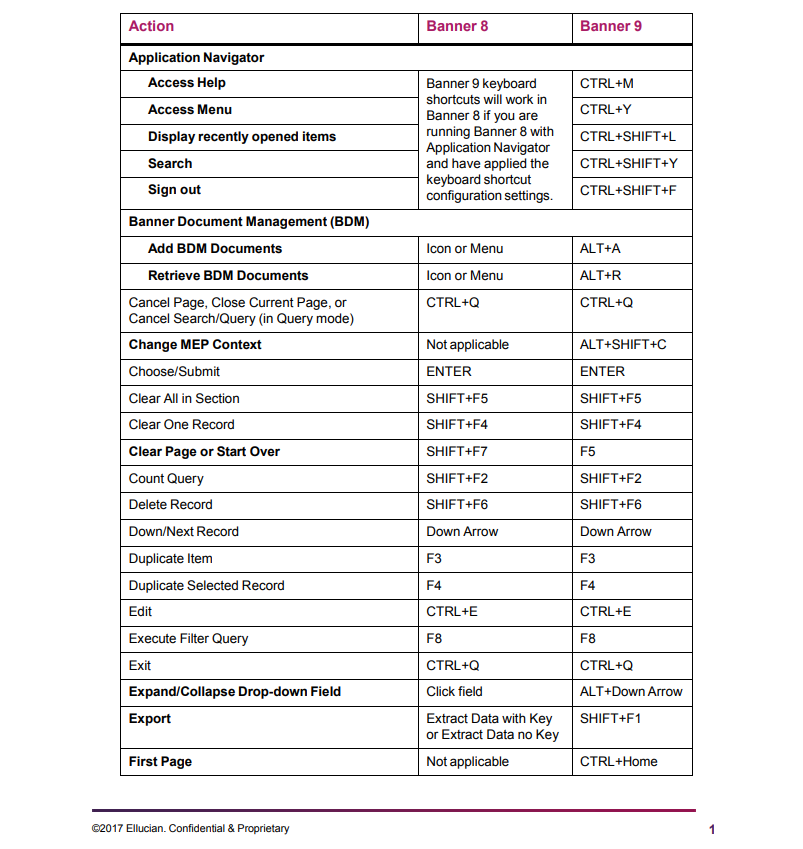
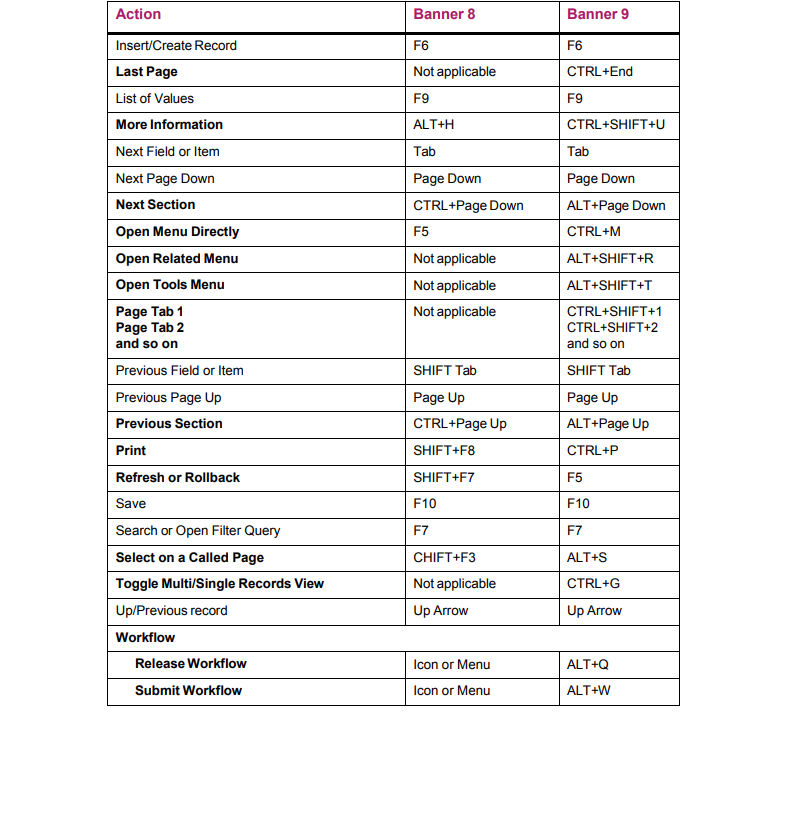
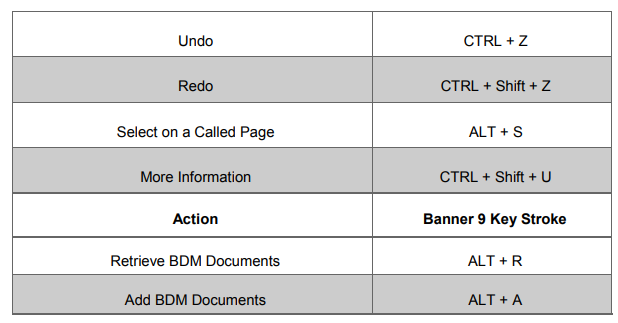
Banner 9 - Keyboard Shortcuts for Windows
Banner 9 Keyboard Shortcuts by Ellucian.pdf
The following table lists the keybooard shortcuts that you can use to navigate through Banner 9.
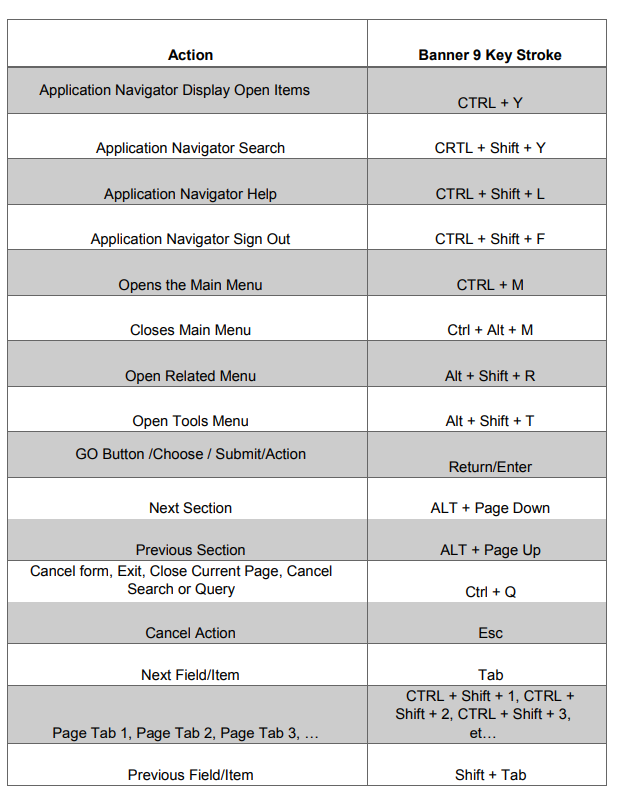
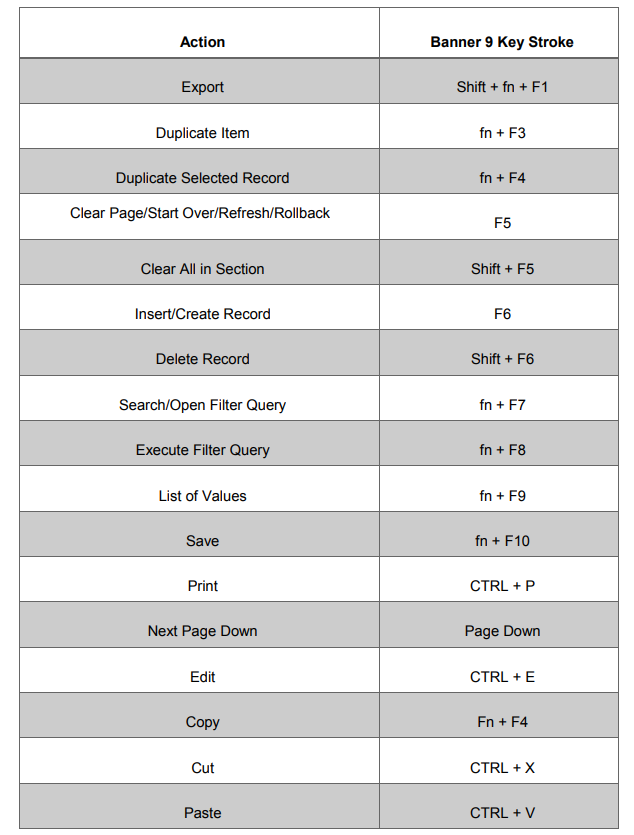
Banner 9 - Keyboard Shortcuts for Mac
Banner 9 Keyboard Shortcuts for Mac
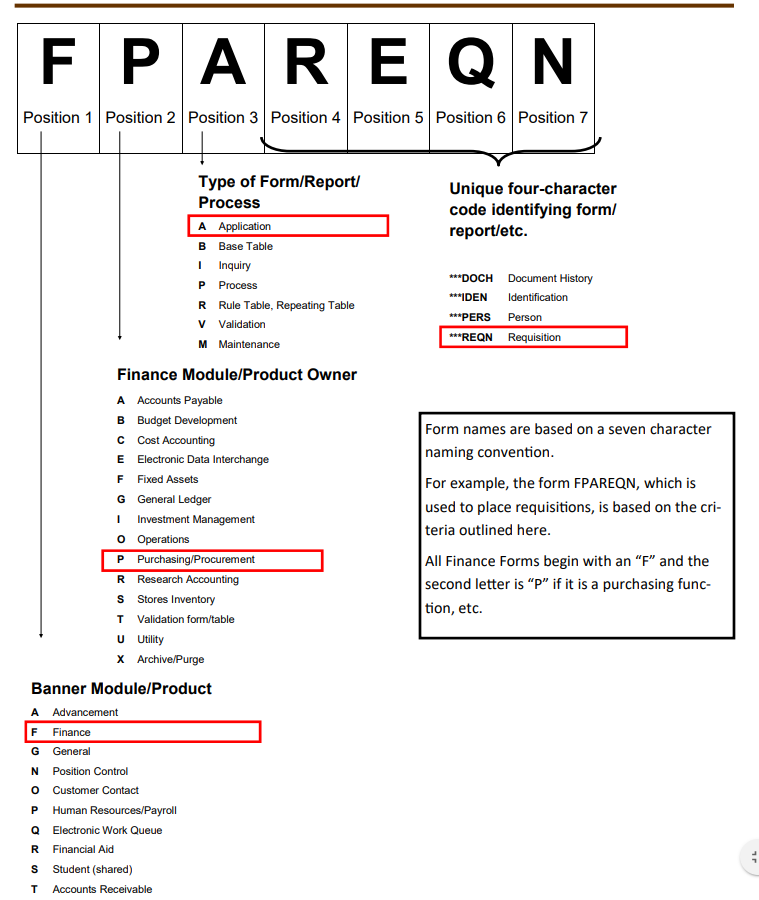
Page (Form) Naming Convention