Adobe Sign: How to Create a Workflow
- Claire Chang
Work in progress
Step 1: Launch Workflow Designer
Log in to Adobe Sign dashboard as an account administrator via https://fhdaedu.na1.echosign.com/public/login
Click on Account => Workflow => Create a Workflow icon to open the Workflow Designer.
You need to be a group admin to use the workflow designer.
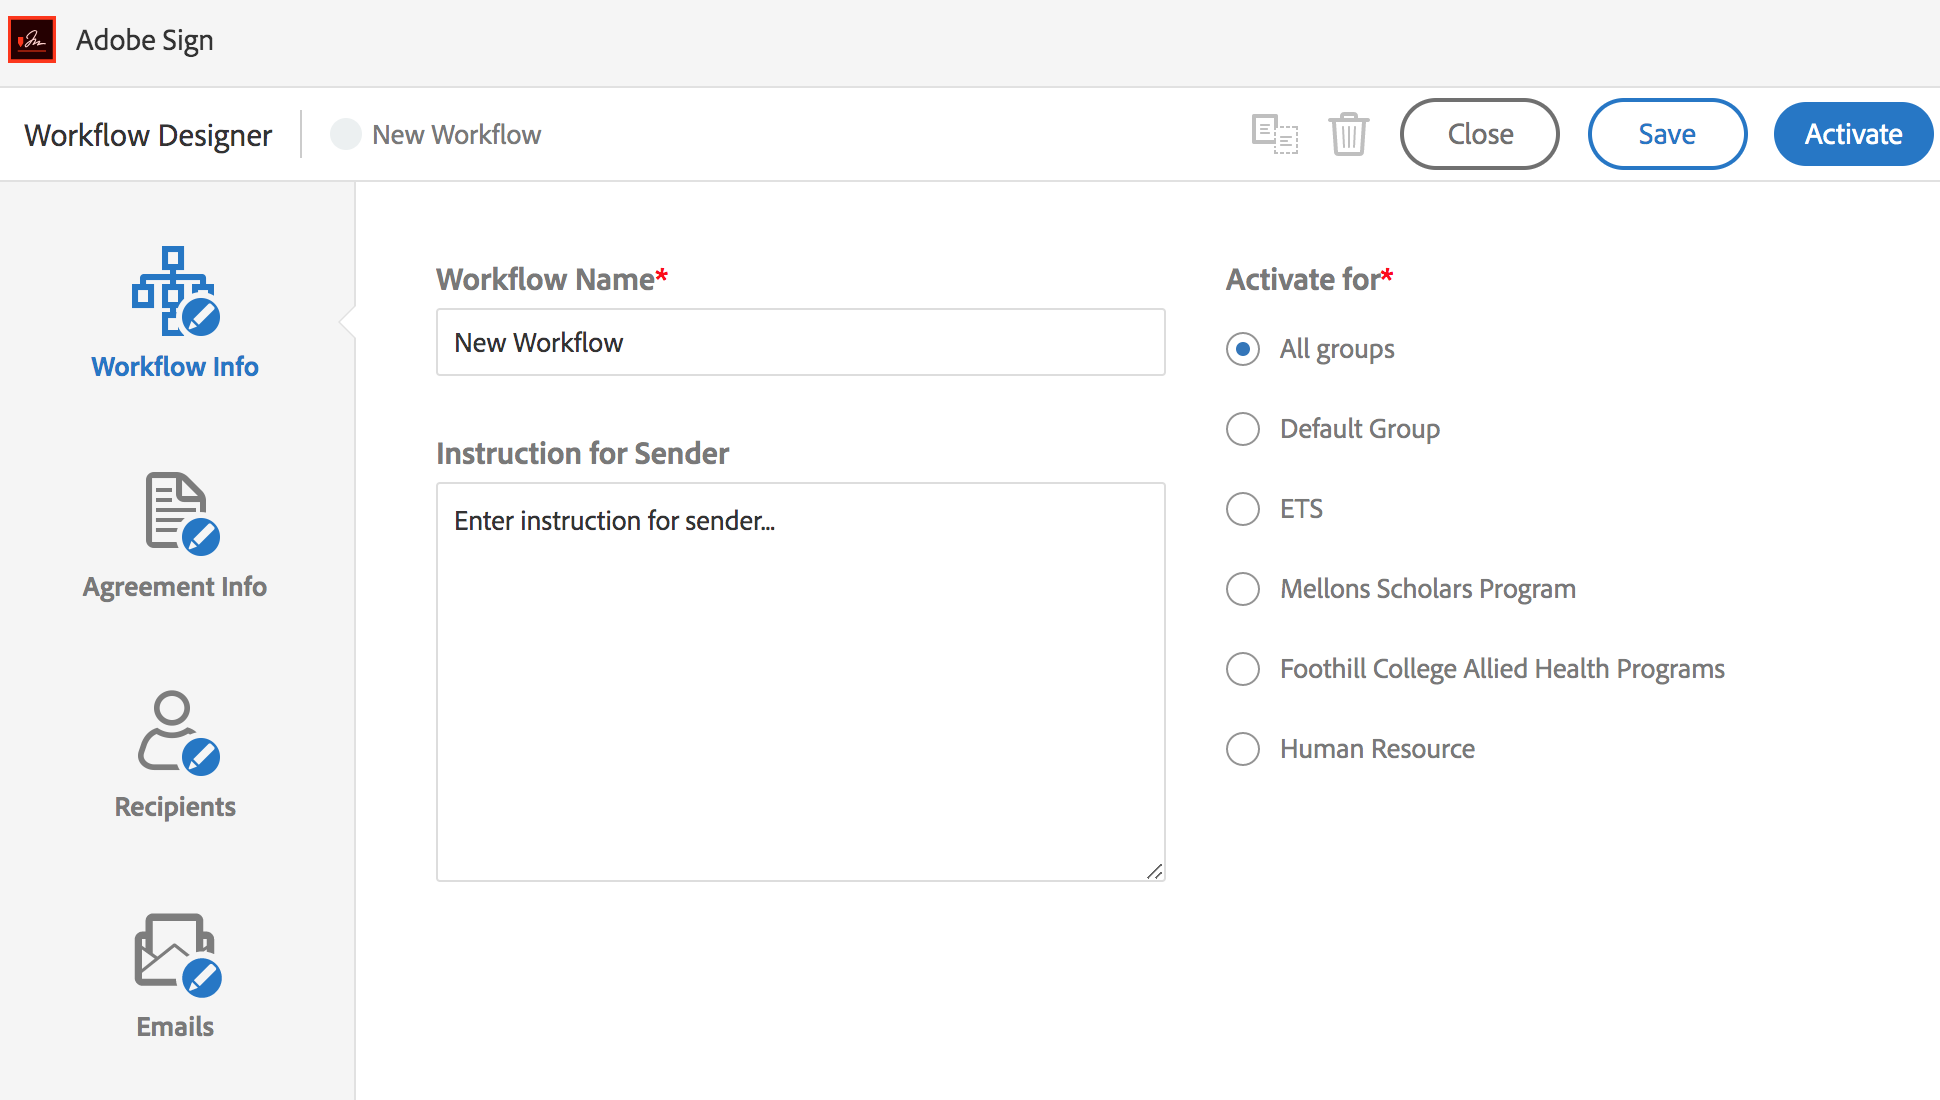
Step 2: Workflow Info
Enter Workflow Name, for example Foothill Instructor Petition to Waive Title 5. Follow Adobe Sign Workflows: Naming Convention.
Enter Instruction for Sender. User should provide this information. This text will appear on the first page of a started workflow.
Enter Activate For: All Groups
All users who sign in via SAML will be automatically provisioned an account in Adobe Sign assigned to Default Group. For now, according to Adobe Sign, each person can only be assigned to one group which significantly reduces the usefulness of the groups feature because many people in the district have multiple roles. For example, student and staff.
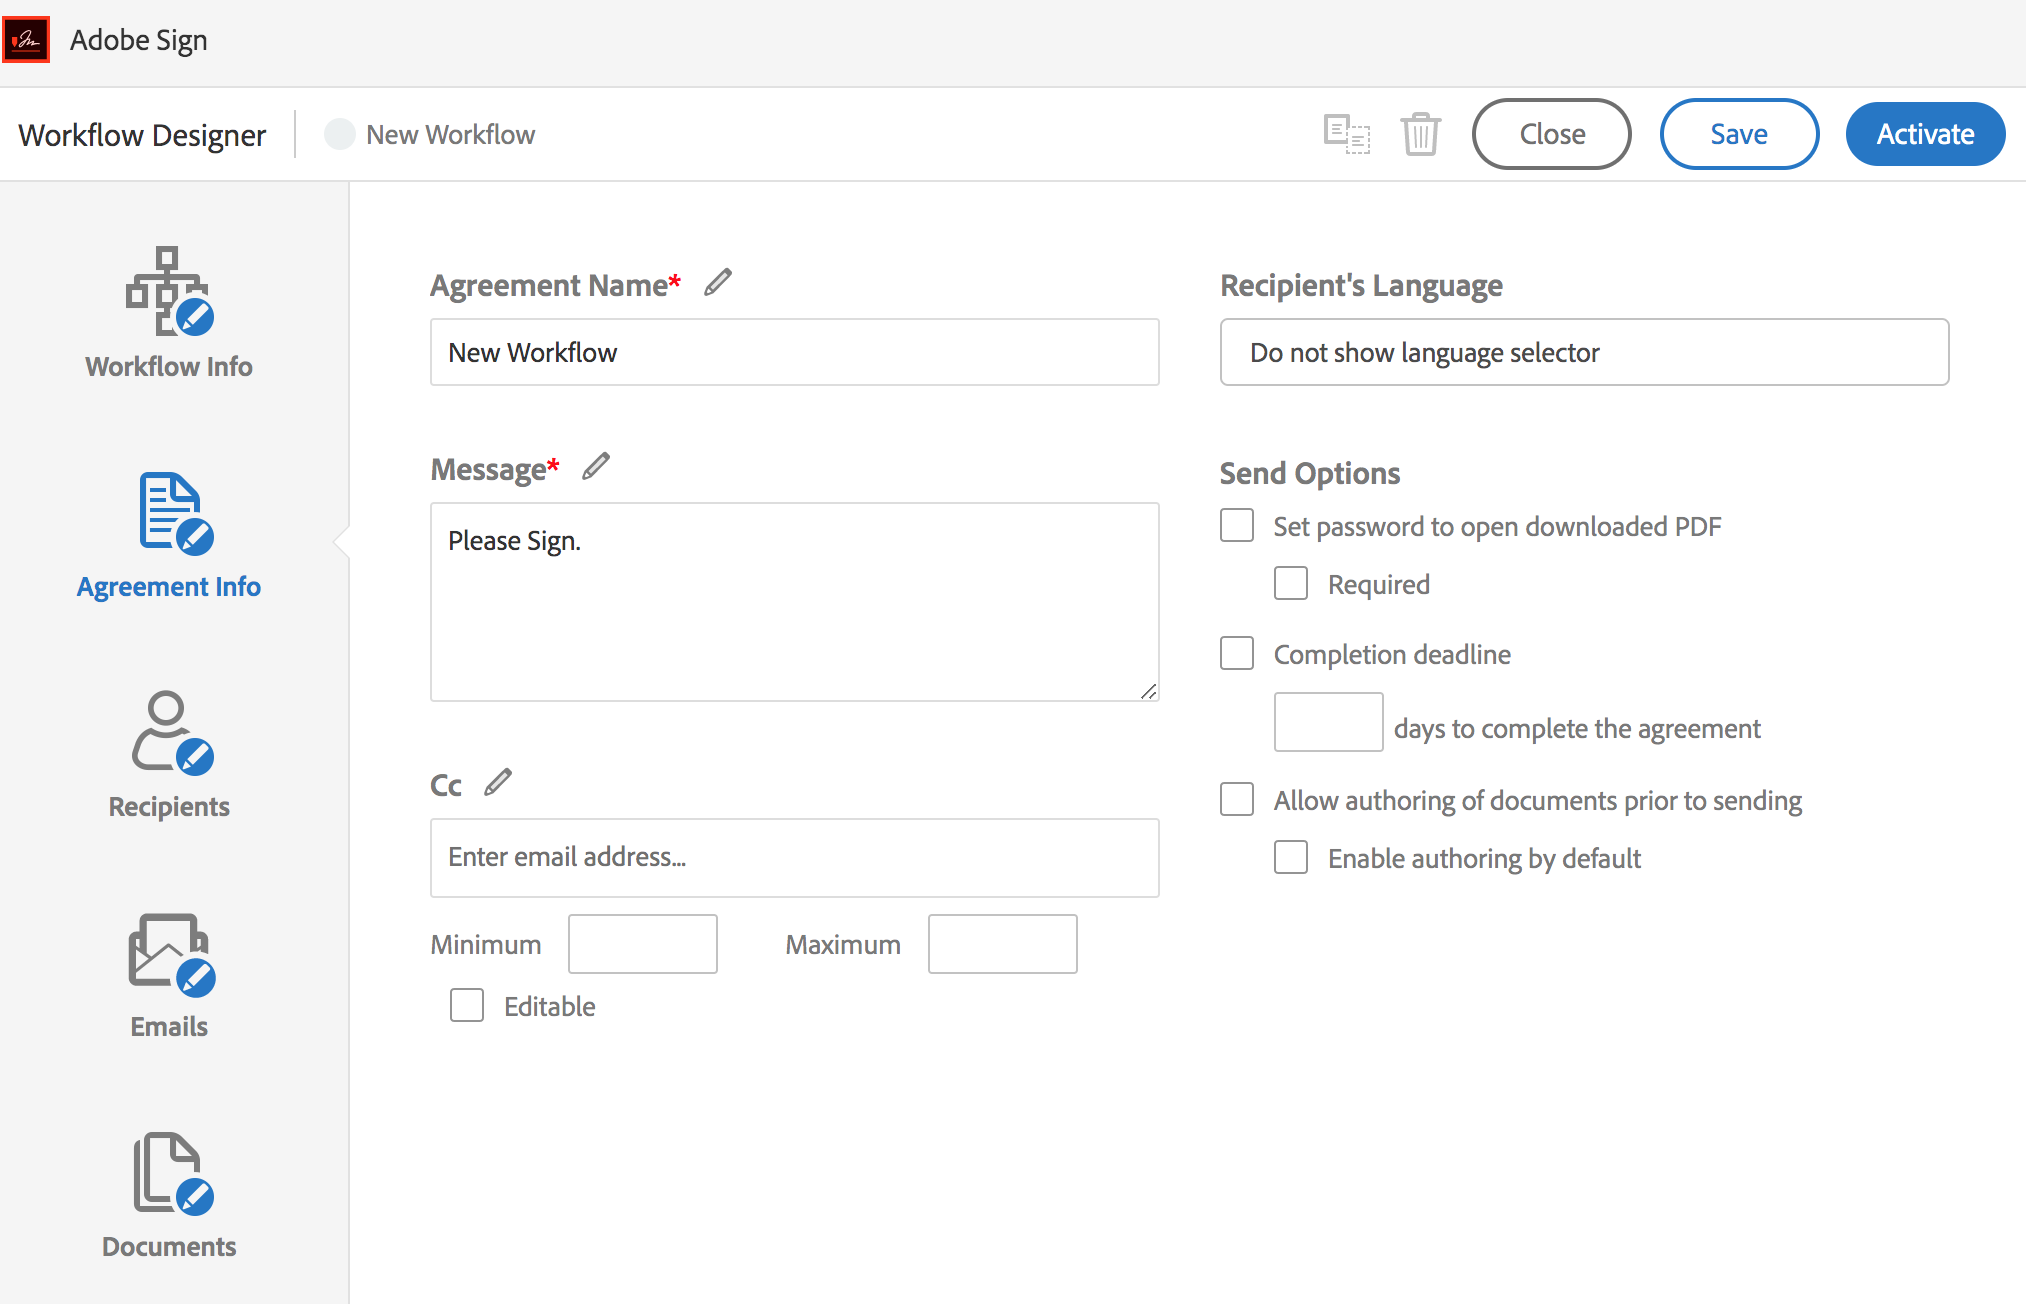
Step 3: Agreement Info
Ask users if Cc, completion deadline are required for the form.
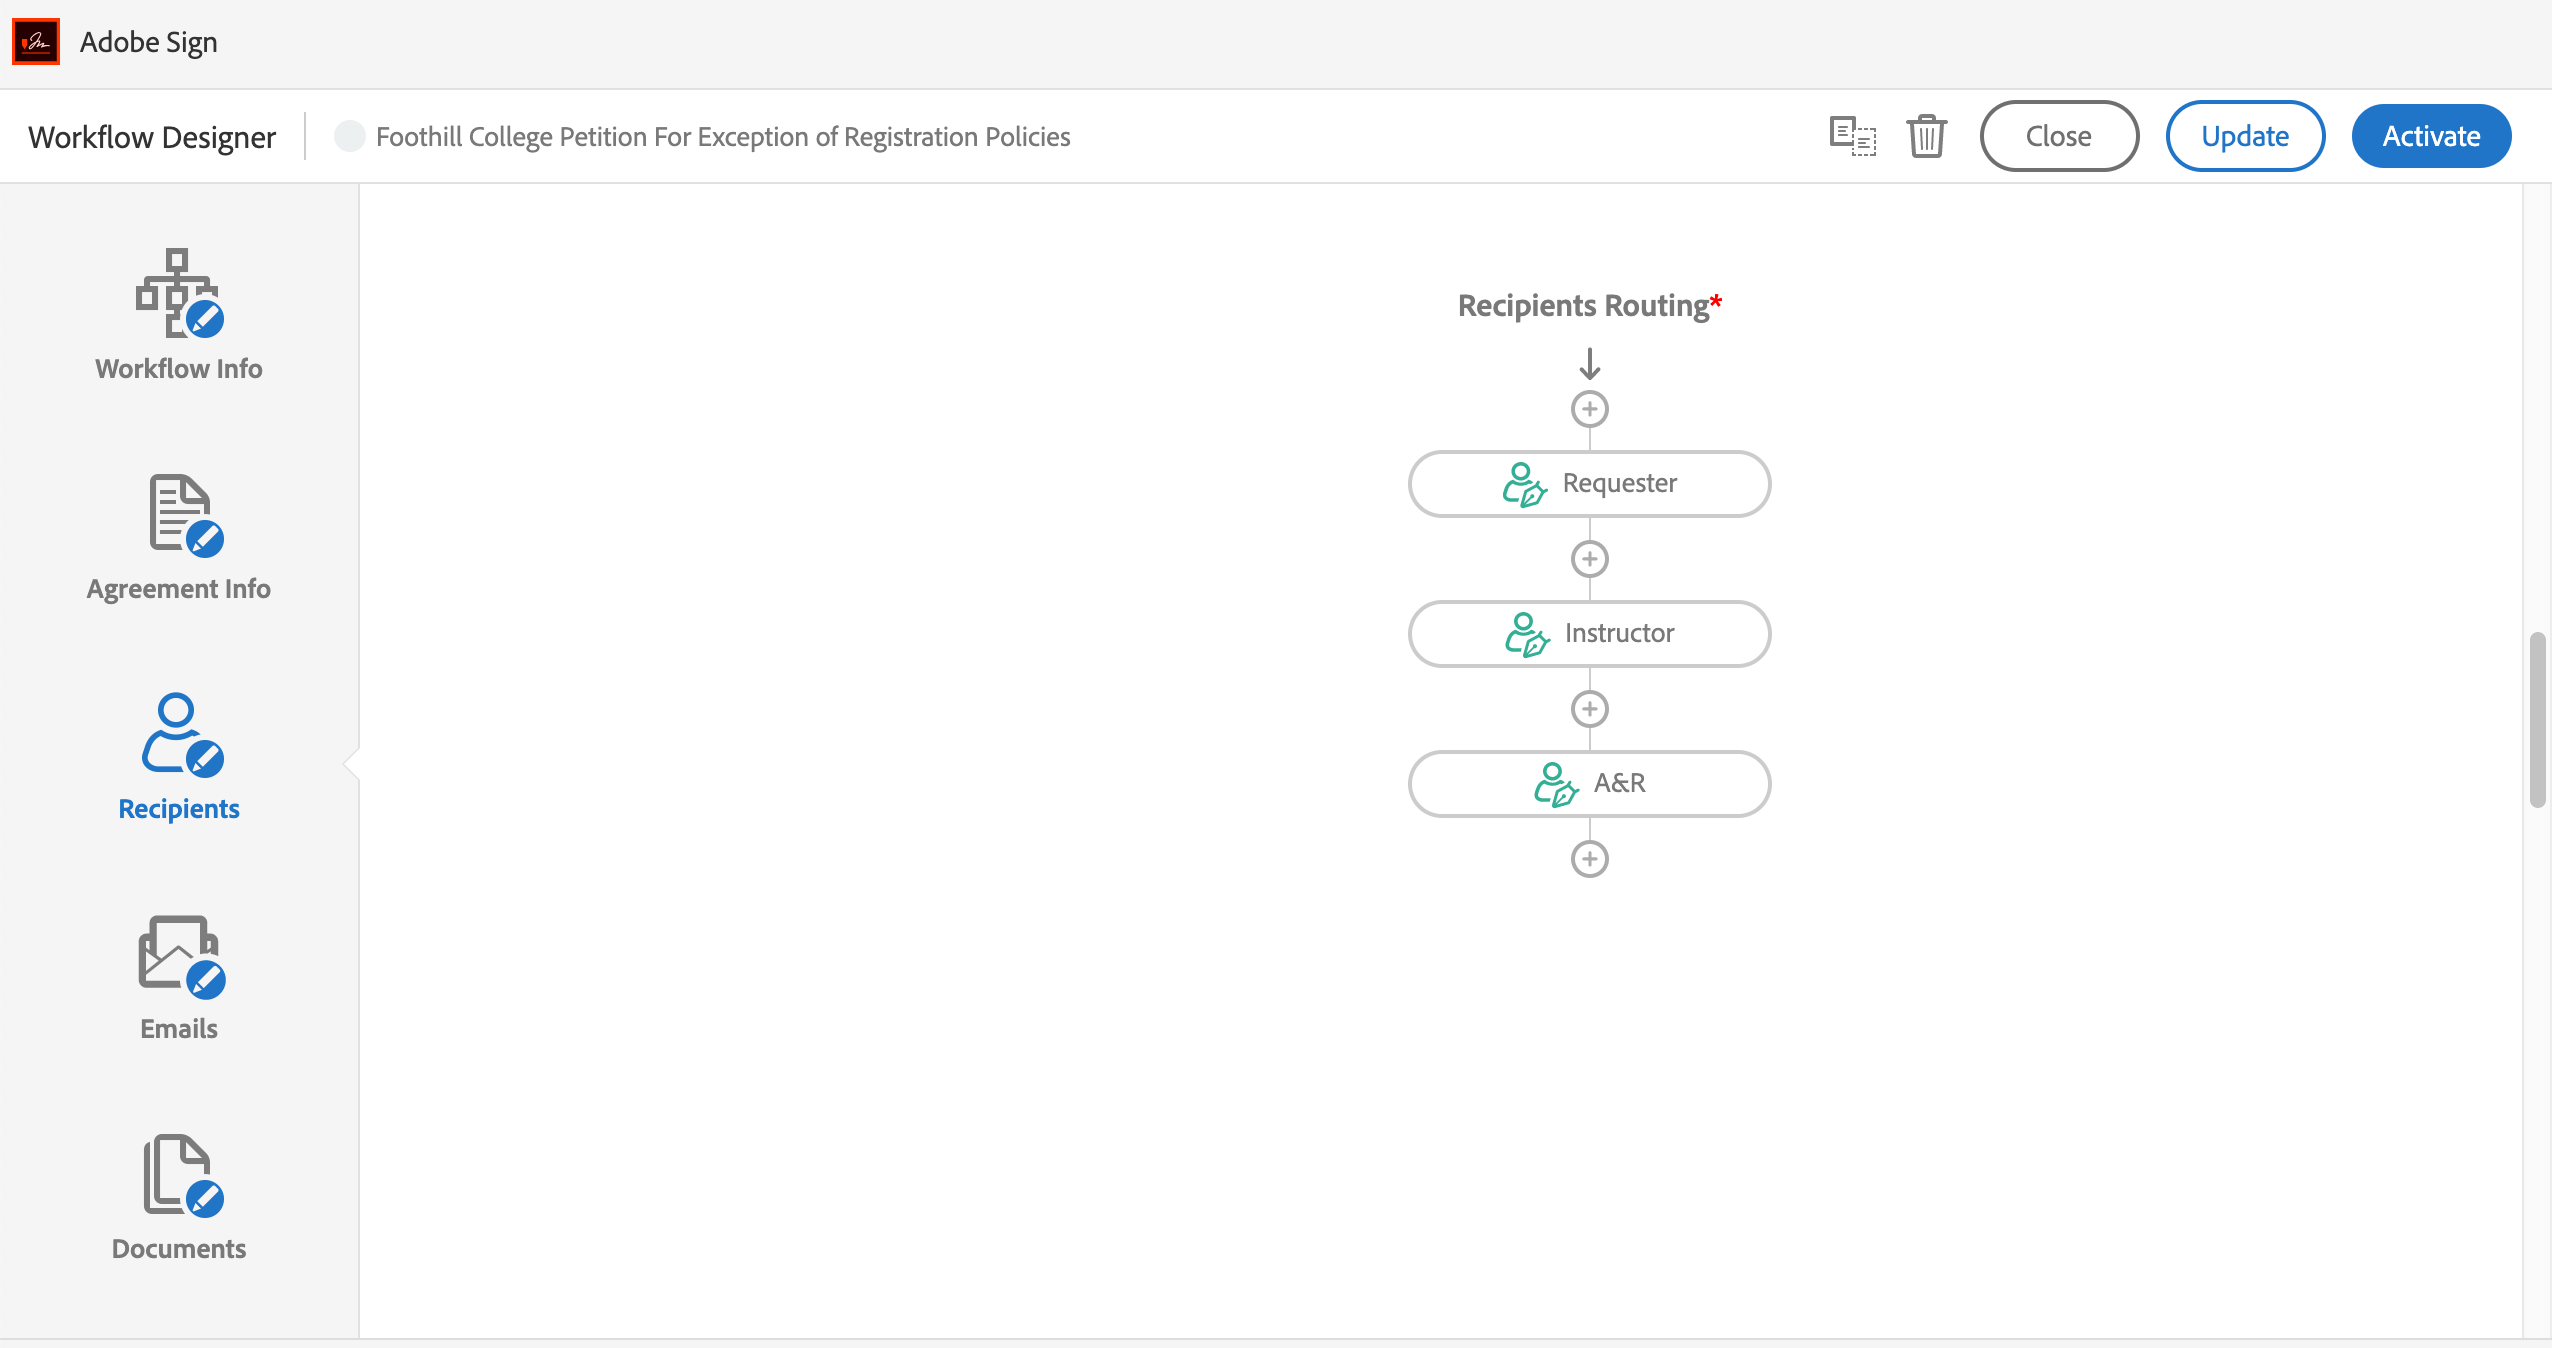
Step 4: Recipients
Set up Recipients Routings. The first recipient has to be called Requester (this value is hardcoded in SignApiClient.js). The requester is the form requester and workflow starter. The requester should fill out most of the fields. This is currently the main use case that we support and found most common. If other use cases arise in the future, we may have to store additional meta data somewhere else.
String the recipients in the workflow designer. Each recipient should correspond to one Signature Block and/or one participant role on the form. Requester maps to Sender/Prefill Participant role. The 2nd recipient maps to Signer 2. The 3rd recipient maps to Signer 3, and etc.
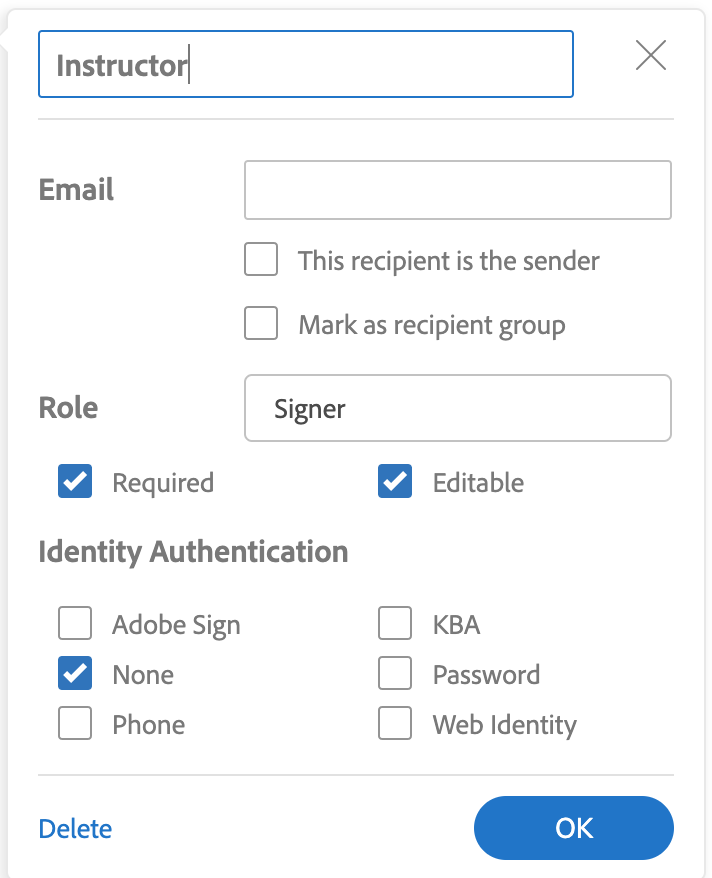
The names of the recipients should be as clear as possible so that the workflow starter/requester know who they are.
For Requester, check "This recipient if the sender" and uncheck Editable.
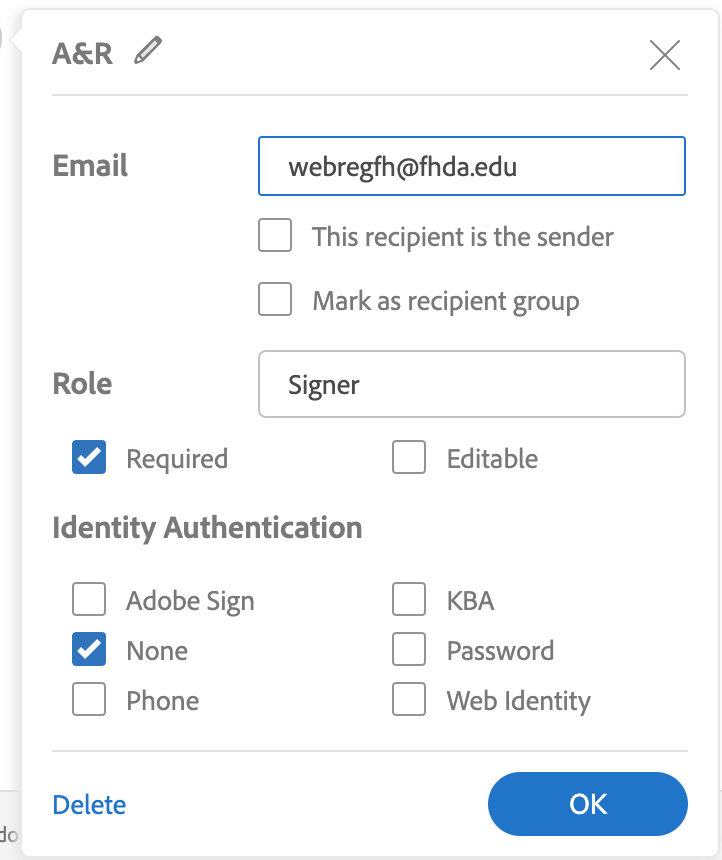
A recipient email address can be entered in the workflow designer if it is fixed for every requester. It can be marked either readonly or editable.
If the recipient may be different for each requester, leave the email address property empty and set it to editable.
If a signature is optional, do not check required attribute. Leave it empty and editable.
If no signature block associated with a participant role, set the role to Acceptor or Approver.
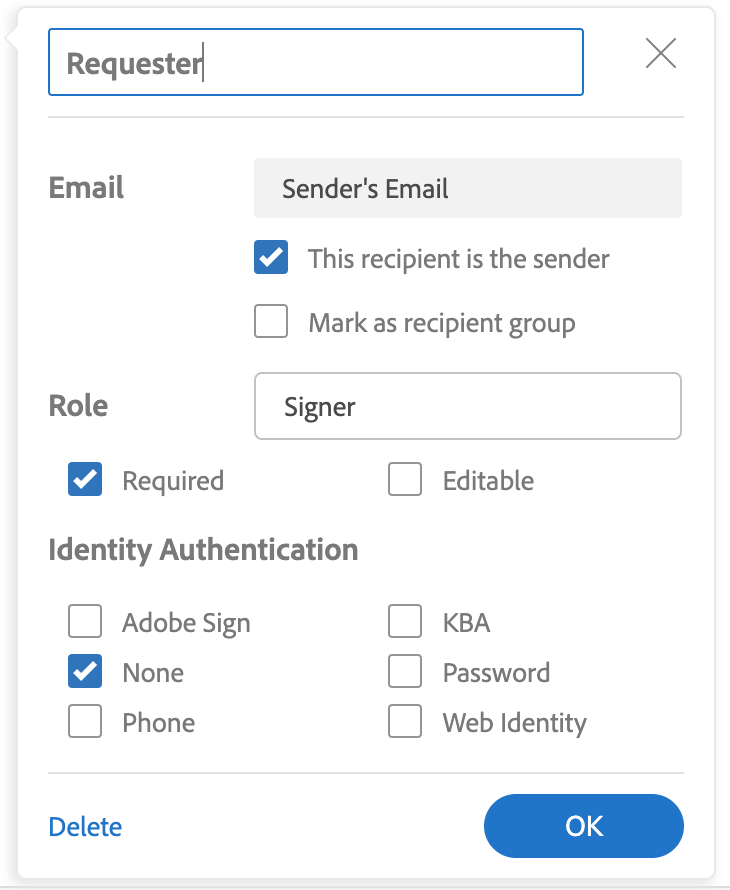
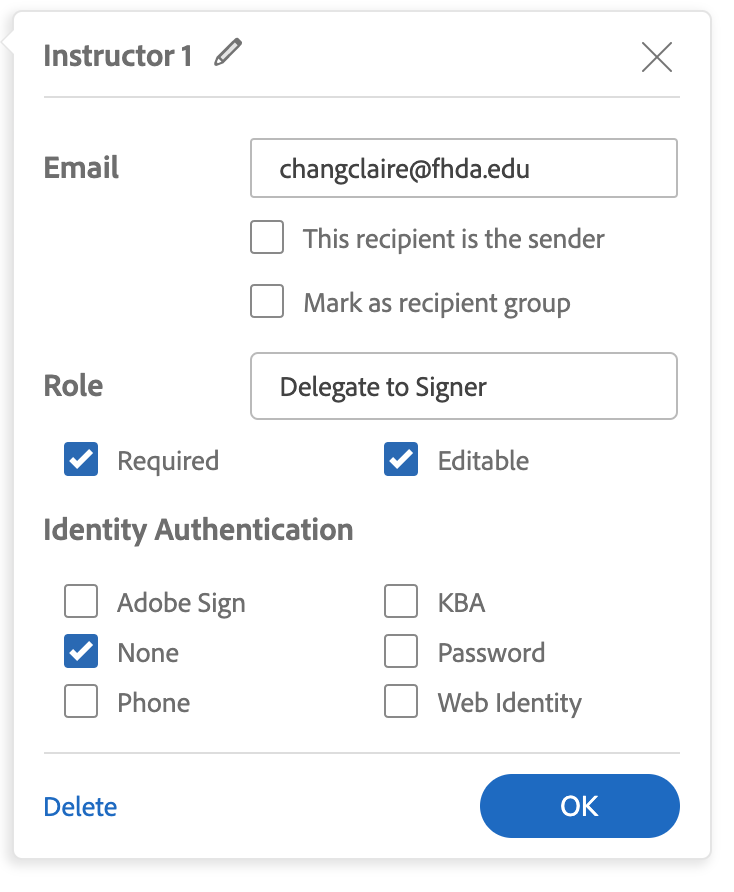
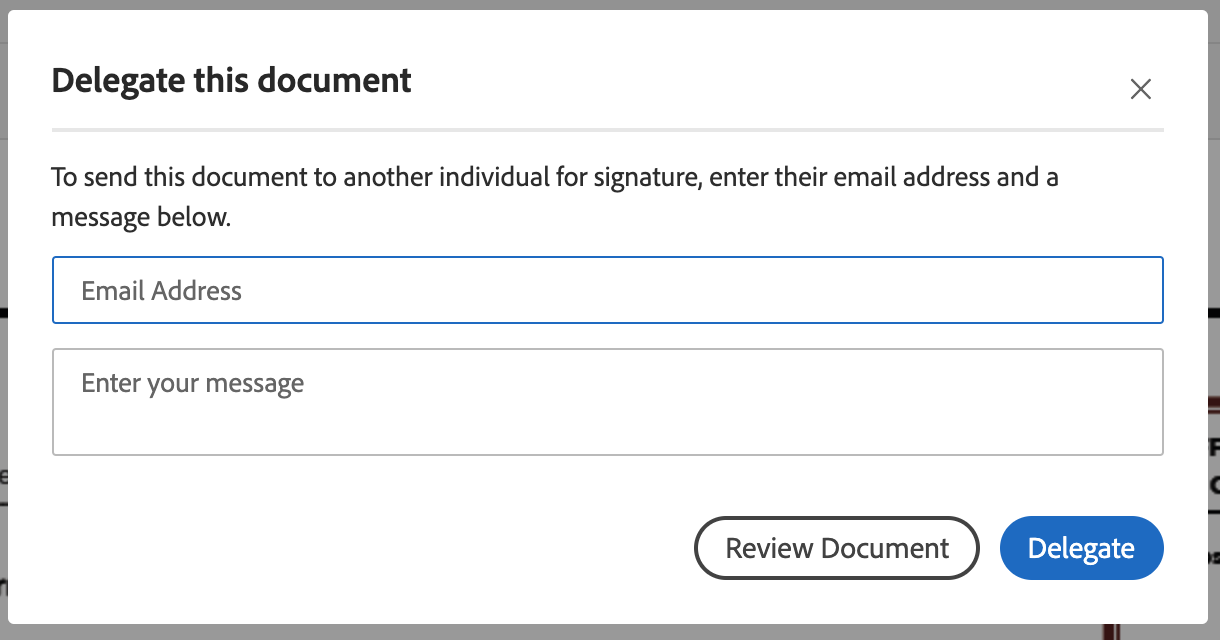
Select "Delegate to Signer" role if needed. Enter email for the delegate if it is known beforehand. When the delegate receives the email and clicks on the link, s/he would be prompted to enter the email or to review the document.
Step 5: Emails
Default setting is fine

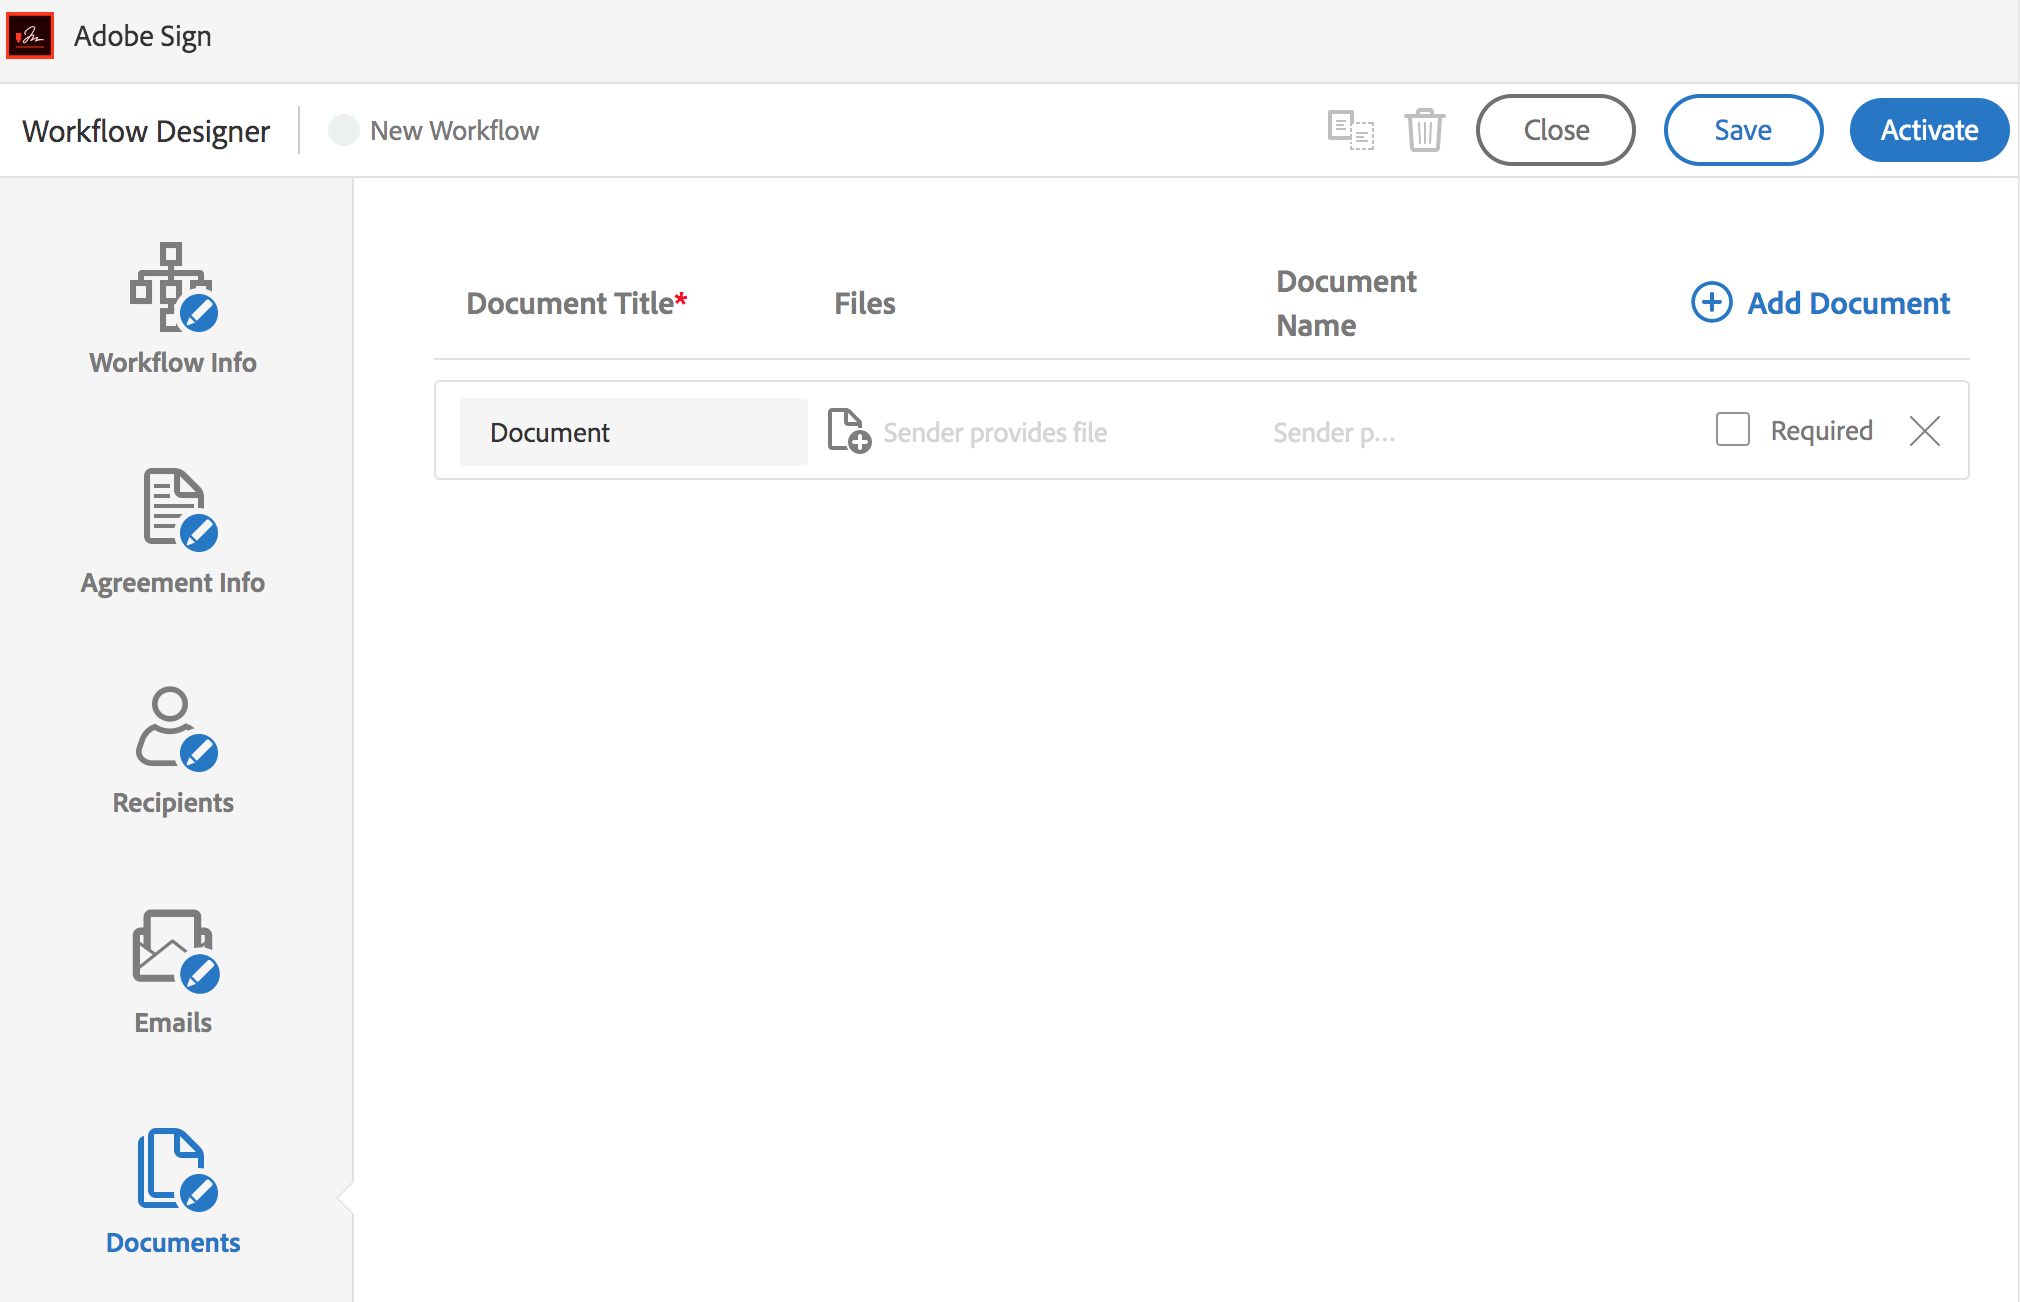
Step 6: Documents
(First, create a reusable template from the fillable PDF. Share it with everyone in the organization. See Adobe Sign: How to Create a Library Template) Select the reusable template from the list and check Required.
Step 7: Save The Workflow
Save the workflow by clicking the Save button.
Step 8: Activate The Workflow
This will make the workflow appear in MyPortal test environment.
Step 9: Go live
To make a workflow appear in MyPortal production environment, update Workflow Info in Step 2 and set Activate For to All Groups.